
Access
Users
Monitor user activity, manage memory, and administer your user base.
With Pickaxe, you can distribute your AI products to everyone. Every person who interacts with your tools will show up on the Users page, giving you a central place to monitor activity, manage memory, and handle user administration.
The Users page has three tabs: Activity, User Memory, and Manage Users.
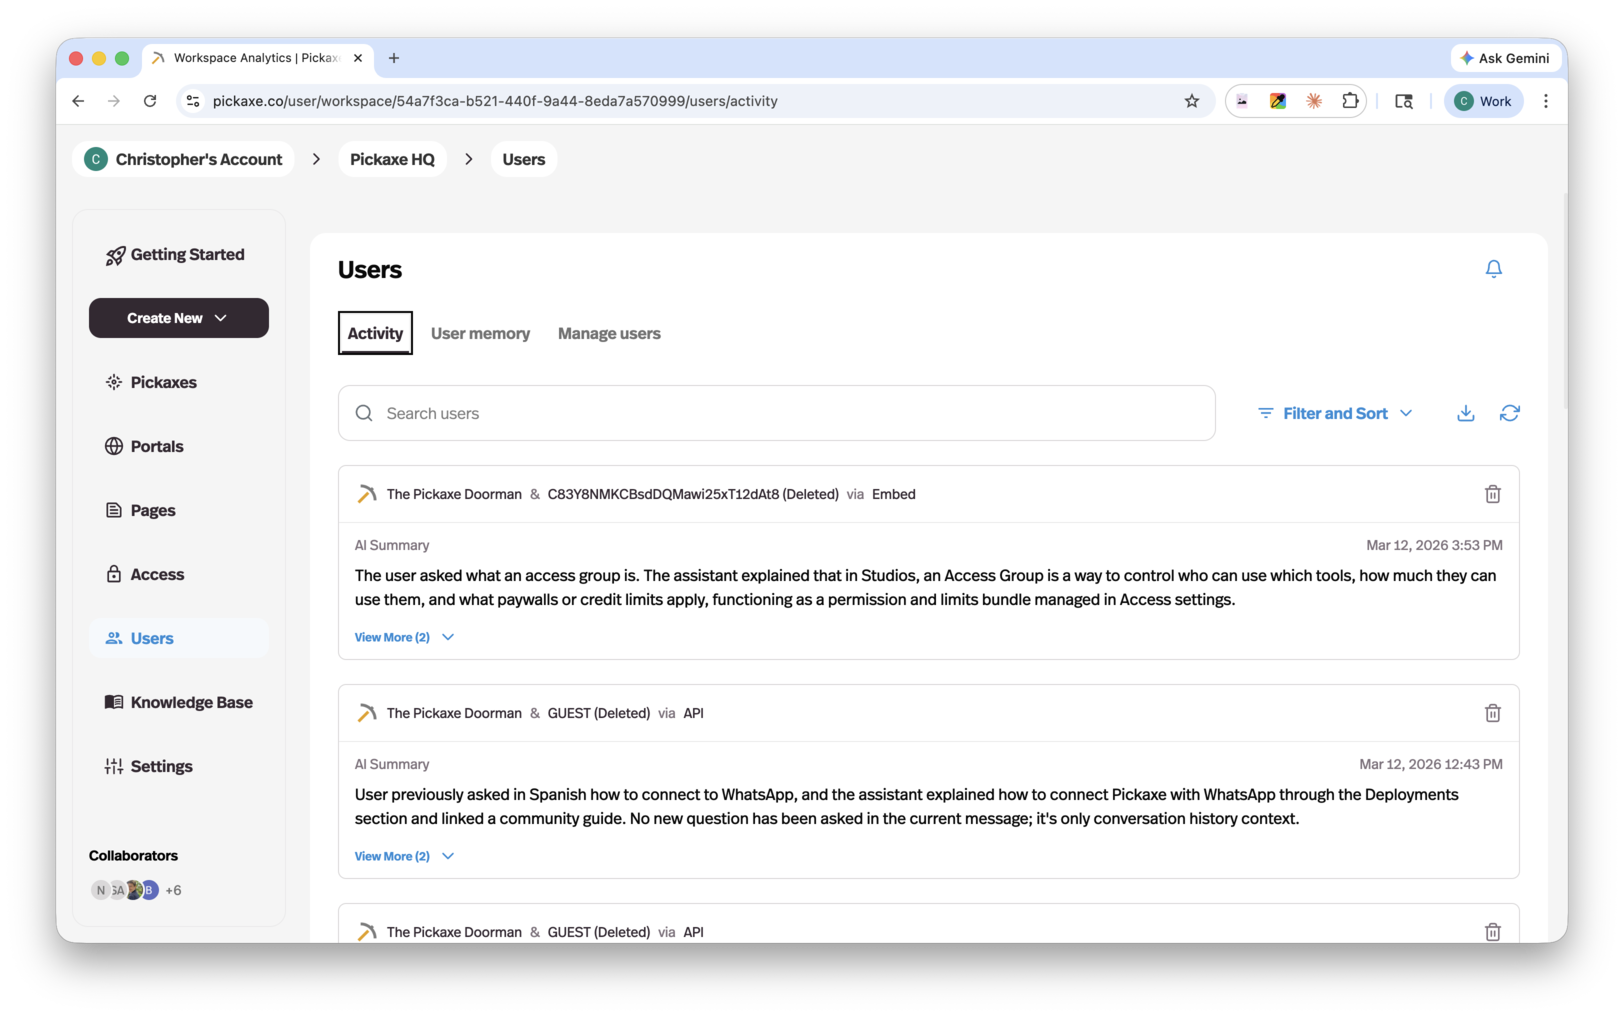
Activity
The Activity tab shows you conversation and action summaries for your users. Use it to understand:
- How your agents are performing
- How users are interacting with your tools
- Where there's room to improve your agents based on real usage patterns
User Memory
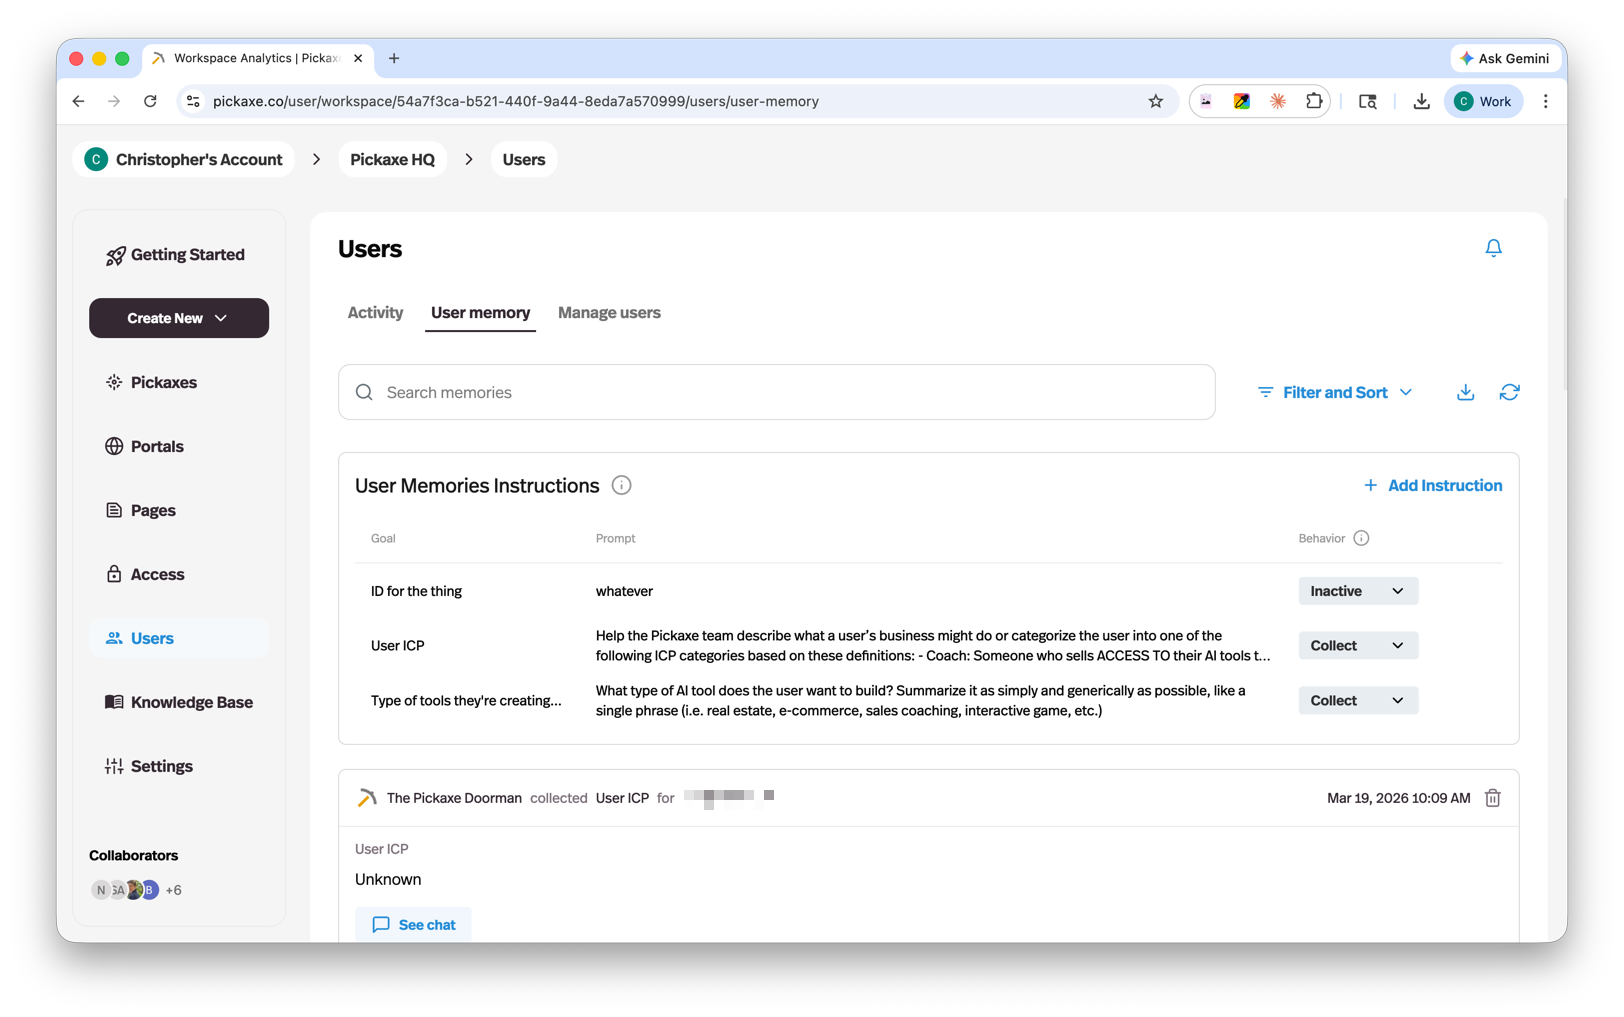
User memory is automatically stored to help improve your agents over time. Memories are stored in a RAG (Retrieval Augmented Generation) system, similar to the Knowledge Base. For each user query, the most relevant entries from that user's memory bank are selected and provided to the AI.
You can add user memory instructions to control what information is recorded and how it's handled. Each instruction has a Goal (its name), a Prompt (what to collect), and a Behavior.
The "General information" memory
Every workspace comes with one memory instruction already in place: General information, which builds a profile of each end user — their name, role or profession, what they're trying to accomplish, their goals, and any context they share in conversation. It's set to Collect and use, so your agents remember who they're talking to out of the box. Like any instruction, you can rename it, edit its prompt, set it to Inactive, or delete it entirely.
Memory behavior settings
Behavior affects how user memories are collected and used:
| Behavior | Description |
|---|---|
| Inactive | Memory instructions are saved as prompts but are not actively used to collect user memories. |
| Collect | User memories are collected but not used in the tool. |
| Collect and use | User memories are collected and used in the tool, but users cannot edit them. |
| Collect, use, and display | Memories are collected, used, and shown to users, who can view and edit their own. (Pro plan) |
Manage Users
The Manage Users tab is where you administer your user base. From here you can:
- View all of your users in one place
- See what plan each user is on
- Review spending and usage details
- Invite users to an invite-only workspace
- Make changes to individual user accounts
Inviting with a QR code
The Invite flow has two modes. Add/Invite by email sends each person their own invitation, which is what you want for a known list. Share a QR code produces one reusable join link instead — anyone who scans it creates an account directly in the access group you picked, which is the mode for an event, a workshop, or a community you can't list in advance.
QR invitations are workspace-owner only and need a member or invite-only group. Choose the group, confirm the portal or deployment the code redirects to, set when the link expires (30 days by default, or No expiration), and hit Generate QR code. Customize QR design changes colors, shapes, gradient, and puts your studio logo in the middle; Download exports an SVG, and Copy link shares the same invitation as a plain URL.
A group has one live code at a time, and Existing QR invitations lists every active one with its destination, expiry, and join count — Manage loads one back into the panel. From there Rotate QR link issues a fresh code and the old one stops working, and Revoke turns the current one off without a replacement. Until you do one of those, anyone holding the code can sign up, so treat it like a shared password.
Banning a user
The menu on a user's row has Ban email and Ban IP. Banning the email stops that address signing in; banning the IP also blocks the machine they signed up from, which is the one to reach for when someone keeps coming back under new addresses. A banned user's row offers Unban to reverse either. Delete is separate and removes the account outright.