Access
Member Access Groups
Restrict access to authenticated members with per-user budgets and upgrade paths.
Member access groups are for users who sign up. They power memberships, subscriptions, tiered products, and upgrade paths — users create an account before using your tools and portals, and everything they do is tracked against their membership.
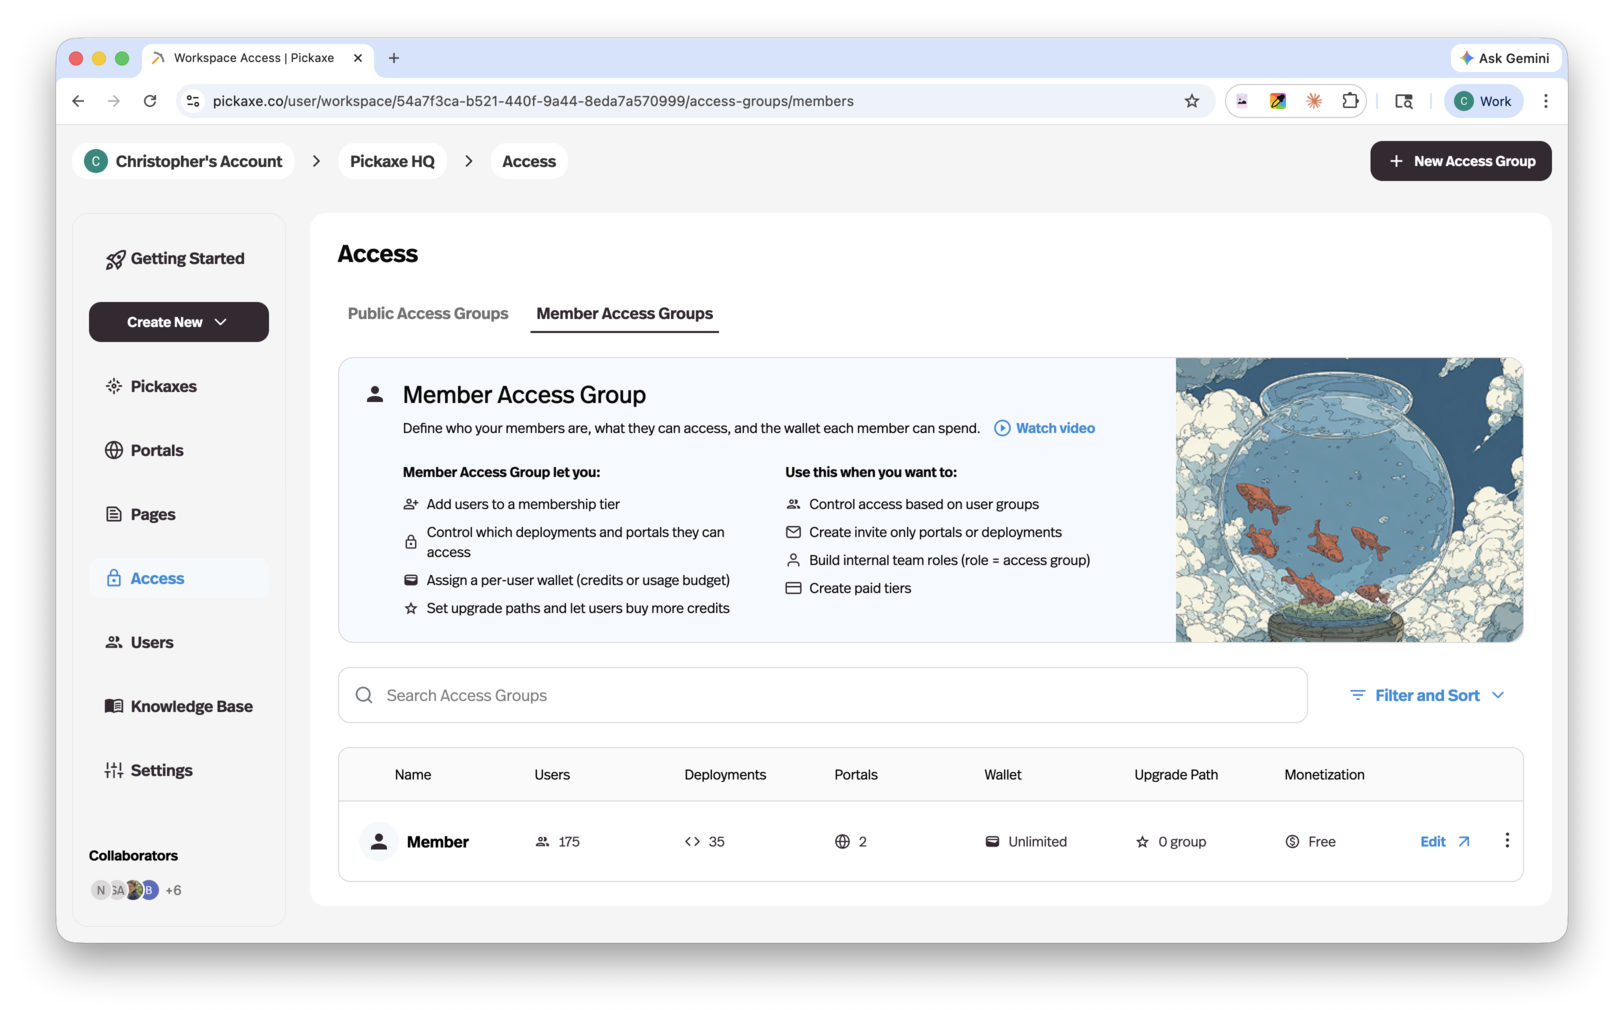
Pickaxe has three types of access groups, and the Access page (under Users in the sidebar) lets you filter by each: Public groups let anyone access your content, Members groups support sign-up, subscriptions, and upgrades, and Invite Only groups are designed for private clients, teams, and communities — those have their own guide in Invite-Only Access Groups.
What you can do with member access groups
- Add users to a membership tier — invite them directly or let them sign up.
- Control which deployments and portals they can access.
- Assign a per-user wallet — a usage budget in credits or uses.
- Monetize — charge a one-time price or a recurring subscription.
- Set upgrade paths — let users move to a higher tier or buy more usage when they run out.
The access group editor
Open any group from the Access page to edit it. The editor has four tabs: Setup, Upgrade, Users, and Deployments.
Setup
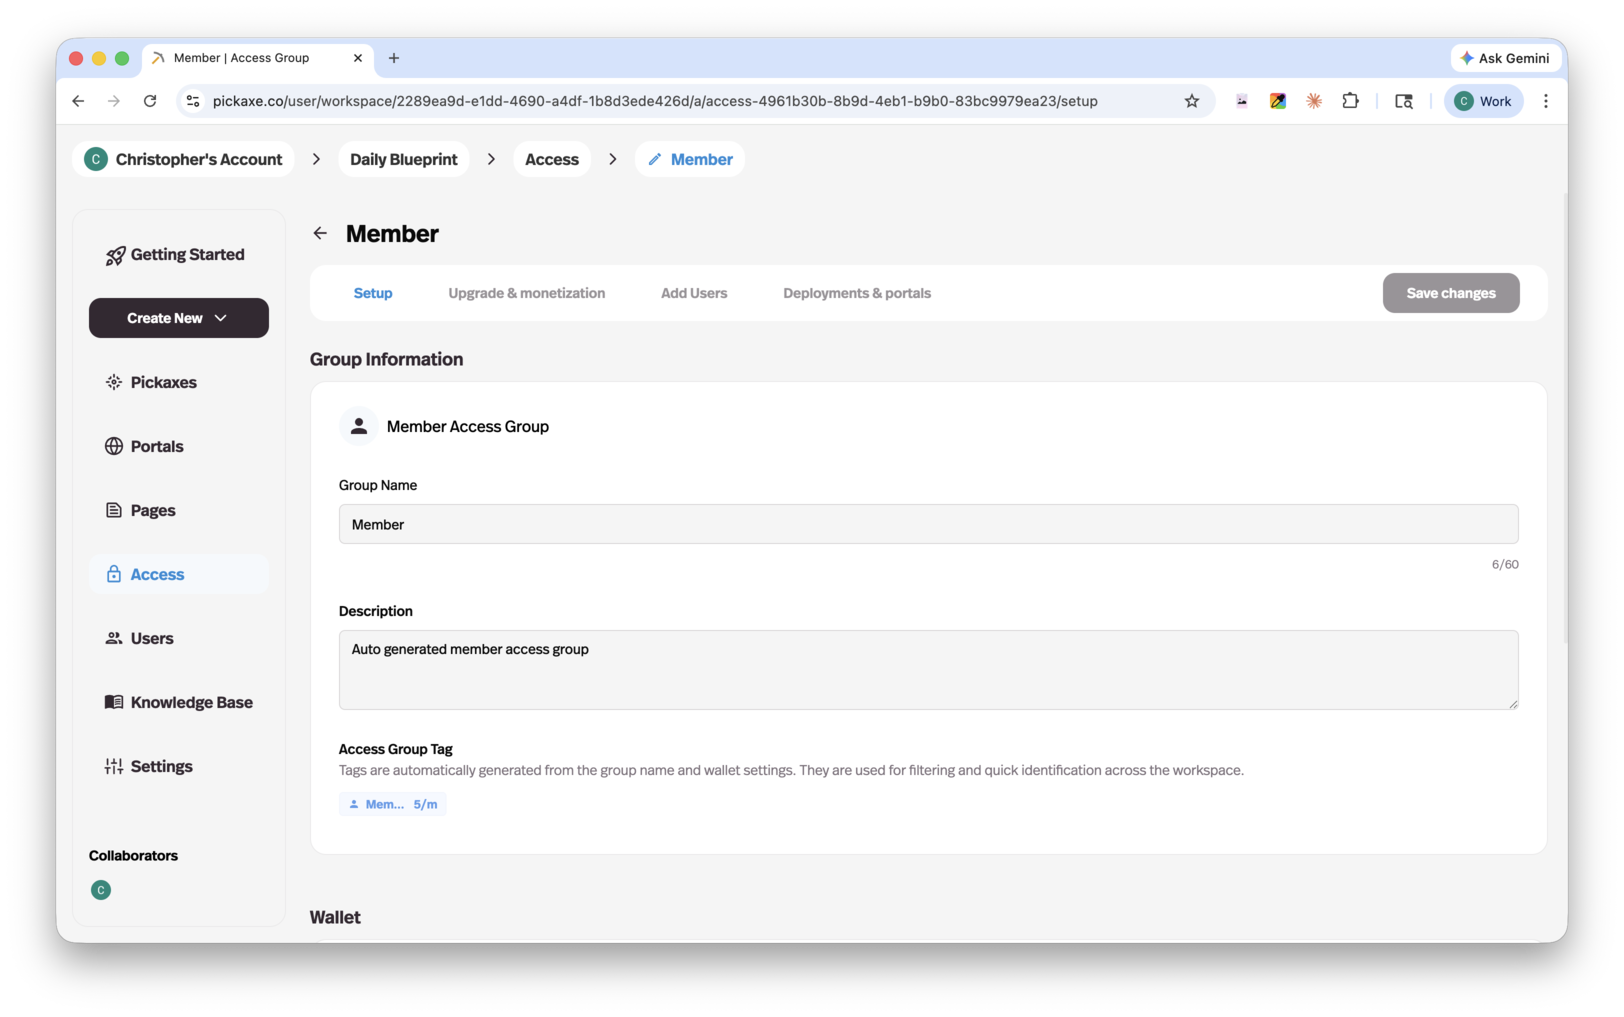
- Group Information — the group's name, a short description users may see on its pricing card, and an auto-generated Access Group Tag used for filtering and quick identification across the workspace.
- Monetization — flip the switch to charge for access. Choose a Pricing Plan: a One time purchase, or a Subscription billed daily, weekly, monthly, or yearly, and set the amount. You'll need a connected Stripe account — the editor links you to payment settings if you haven't connected one yet.
- Usage Limit — what each member can spend. Choose Unlimited, or an allowance of uses or credits per day, week, month, or year (or a one-time allowance). Members groups can also offer a Free Trial Period — a set number of days with a limited or unlimited allowance before the paid plan kicks in.
- Card Preview — a live preview of how this group appears as a pricing card to your users. Click the card to edit it.
Upgrade
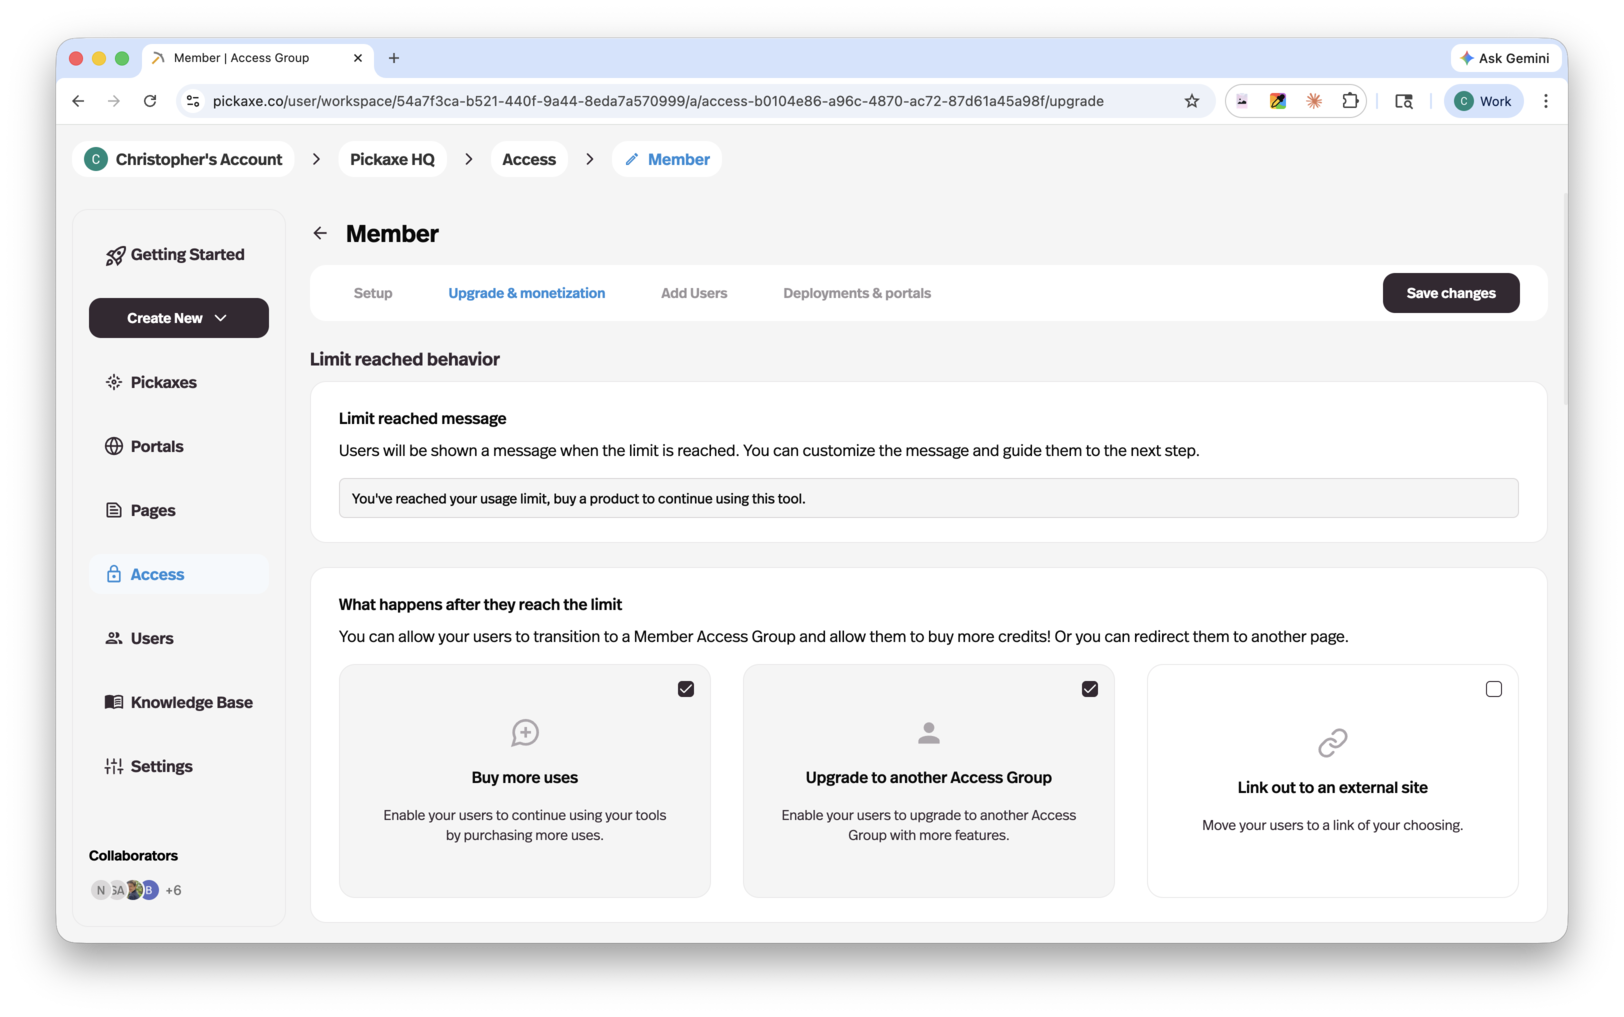
This tab controls what happens when a member runs out of usage:
- Limit reached message — the message users see when they hit their limit.
- What happens after they reach the limit — enable any of:
- Upgrade to another Access Group — connect one or more groups as upgrade tiers. If an upgrade group doesn't have a portal yet, Pickaxe offers to connect it to the same portal as the current group.
- Buy more uses / Buy more credits — let users top up their wallet. The packages and pricing are configured in User Settings → Usage Cost.
- Link out to an external site — send users to a URL of your choosing, with a customizable button label. External checkout is manual: Pickaxe sends users to your link, and you grant the access or credits after purchase.
- Pricing Page Preview — see the pricing page exactly as your users will, and click any card to customize it.
Users
Add and manage the group's members. Type or paste a list of emails, choose whether to send a Studio invitation email, pick which portal or deployment the invite link points to, and click add. You can also pull in existing workspace users, and moving someone who already belongs to another group asks you to confirm first.
Deployments
Connect the group to a portal and to deployments. An access group connects to one portal at a time, and deployments are connected to the start group of an upgrade path — upgrade groups inherit deployment access automatically, so users who move up keep access to everything below.
When to use member access groups
Use a members group whenever you need to know who your users are: paid products, gated communities, client work, internal team roles, or anything with tiered pricing. If anyone should be able to try a tool without signing in, put a public access group in front; if membership should be by invitation or approval only, use an invite-only access group.
Example: Tiered access in practice
A common setup is three groups forming one product:
- Guest (public) — a few free uses for anyone, no sign-up required.
- Starter (members, free or low-cost) — sign up to get a monthly allowance of the core agents.
- Pro (members, subscription) — a bigger allowance, more agents, and a portal with extra pages and resources.
Guest's upgrade path points to Starter, Starter's points to Pro, and each group's usage limit controls how far users get before they're prompted to move up. You can start simple — even just a public group and one paid tier — and add groups as your product grows.