
Client onboarding is one of those things that sounds simple until you actually have to do it at scale.
You know the drill. A new client signs on. You send a welcome email. Then a questionnaire. Then a follow-up because they forgot to fill it out. Then you need documents — contracts, credentials, brand assets. Half the time you're chasing people through email threads that are six replies deep.
It's tedious. It's time-consuming. And it's exactly the kind of repetitive, structured workflow that AI agents are perfect for.
In this guide, I'll walk you through how to build a fully functional AI agent for client onboarding using Pickaxe — from mapping your onboarding workflow to deploying the finished agent on your website or client portal. No code required.
By the end, you'll have an agent that can handle intake conversations, collect information, answer client questions, and even trigger actions in your existing tools.
Why Use an AI Agent for Client Onboarding?
Before we build anything, let's talk about why this matters.
Traditional onboarding usually involves some combination of forms, emails, PDFs, and calendar links. It works, but it creates friction at the exact moment you want your new client to feel taken care of.
An AI onboarding agent changes the dynamic completely. Instead of handing someone a stack of paperwork, you give them a conversational experience that walks them through everything step by step.
Here's what a good onboarding agent can do:
- Collect client information through natural conversation instead of rigid forms
- Answer common questions about your services, timelines, and processes on the spot
- Guide clients through document submission with clear instructions for each item
- Route information to your CRM or project management tool automatically via integrations
- Provide 24/7 availability so clients can complete onboarding on their own schedule
- Maintain a consistent experience regardless of which team member would normally handle intake
According to a McKinsey report, companies that automate their client-facing workflows see a 20-30% reduction in operational costs. For agencies and consultancies handling dozens of new clients per month, that's a significant impact.
The best part? You don't need a dev team to build one. Let me show you how.
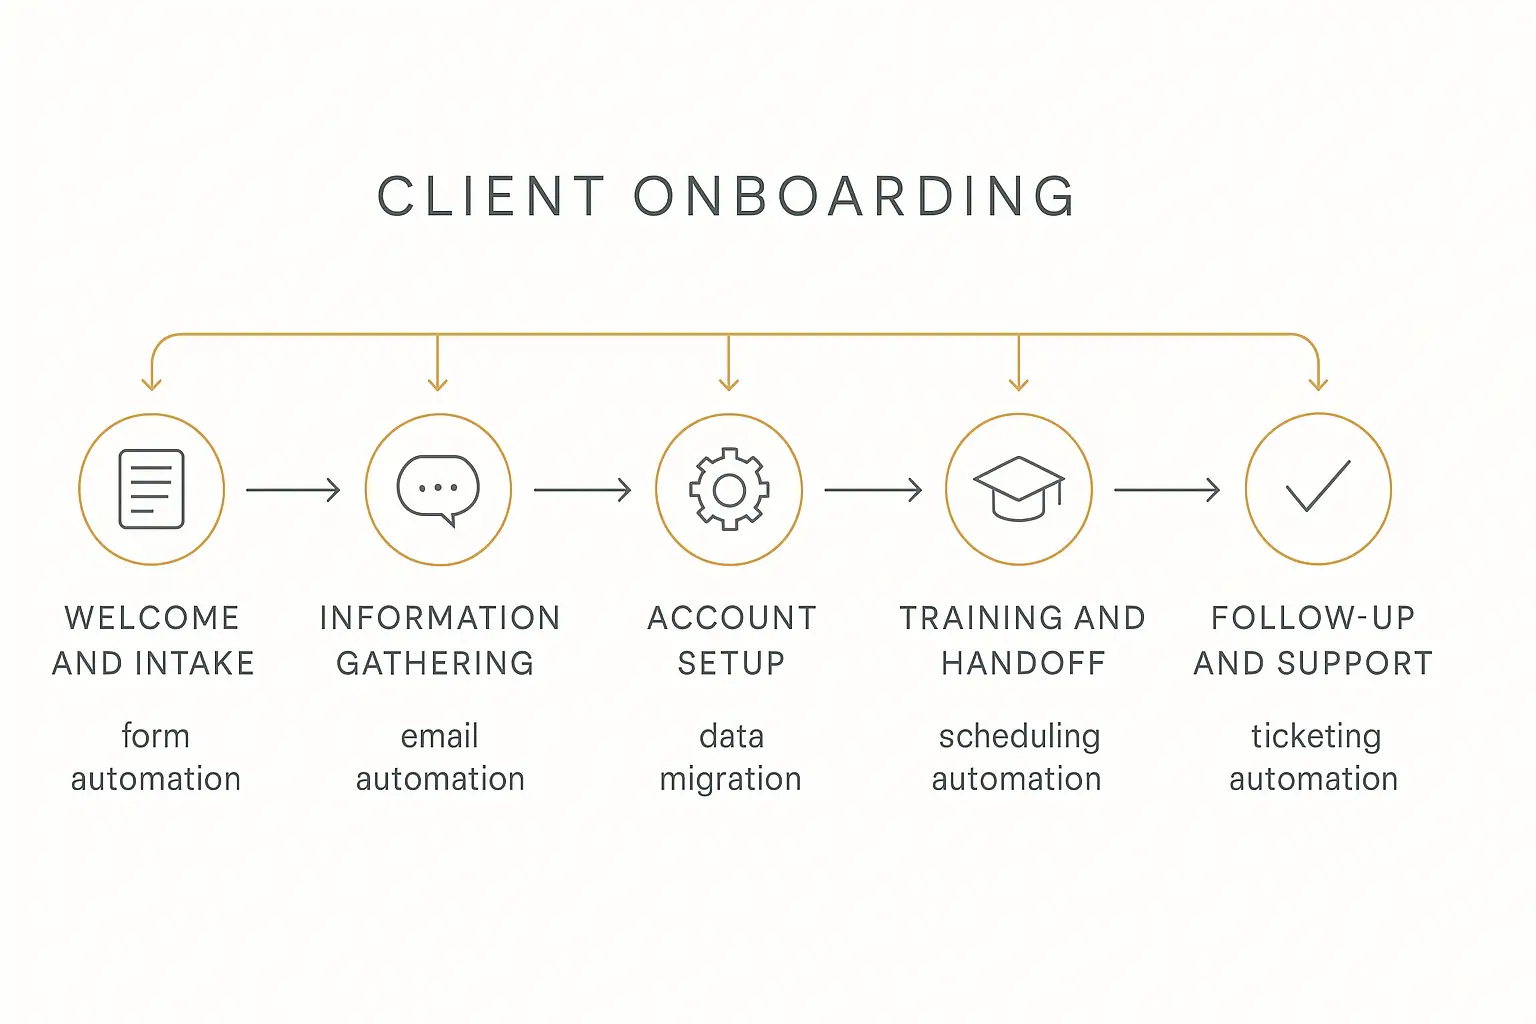
Step 1: Map Your Onboarding Workflow
Every good AI agent starts with a clear understanding of the process it's replacing.
Before you open Pickaxe (or any tool), grab a notebook and map out your current onboarding flow from the client's perspective. Ask yourself:
- What information do you need from the client? (Name, company, project details, timeline, budget, etc.)
- What documents do you typically collect? (Contracts, brand guidelines, access credentials, existing assets)
- What questions do clients usually ask during onboarding? (Pricing breakdowns, timeline expectations, who their point of contact is)
- What actions happen after intake? (CRM entry, Slack notification, task creation, welcome email)
- Are there different onboarding paths? (Different service tiers, different industries, different project types)
Write all of this down. This becomes the blueprint for your agent's instructions.
Here's a simplified example for a marketing agency:
| Stage | What Happens | Agent's Role |
|---|---|---|
| Welcome | Client enters, agent introduces itself | Set tone, explain the process |
| Intake | Collect company name, industry, goals, budget | Ask structured questions conversationally |
| Scope | Determine which services the client needs | Guide through options based on answers |
| Documents | Request brand assets, credentials, contracts | Explain what's needed and accept uploads |
| FAQ | Answer common onboarding questions | Pull from knowledge base |
| Handoff | Route collected info to the right team | Trigger actions (CRM update, Slack message) |
Having this map makes building the agent dramatically faster. You're not guessing at what it should do — you know exactly what conversations it needs to handle.
Step 2: Create Your Agent in Pickaxe
Now we build. Head over to Pickaxe and log in (there's a free tier, so you can start without spending anything).
From your workspace dashboard, click "Create Agent" to open the Agent Builder. You'll see three tabs: AI Helper, Editor, and Preview.
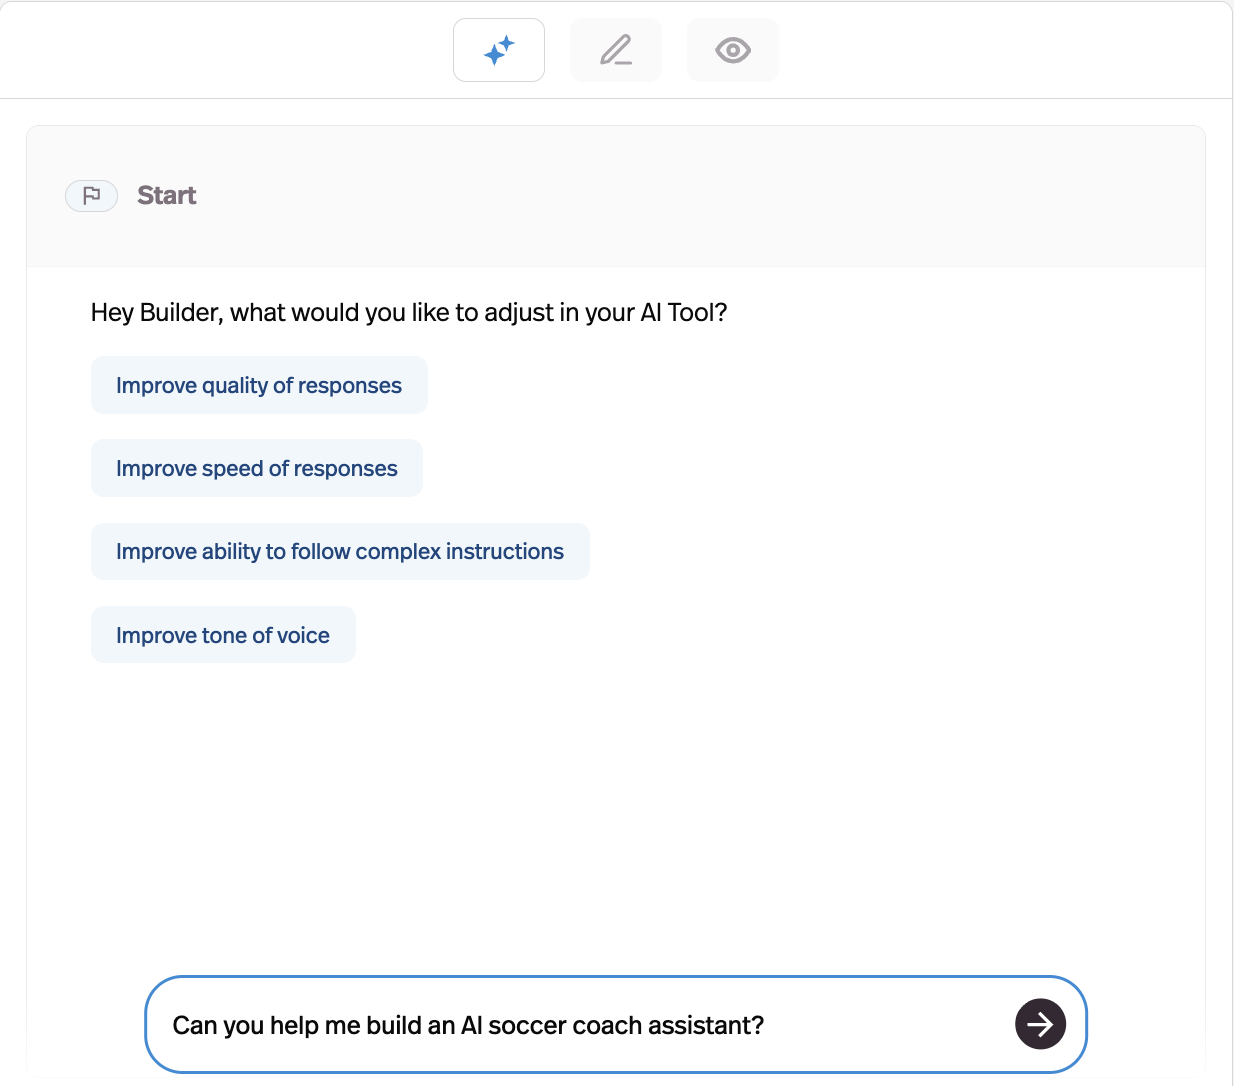
If you're new to Pickaxe, the AI Helper tab is a great starting point. It's a conversational assistant that walks you through setting up your agent step by step. You can tell it something like:
"I want to build a client onboarding agent for my marketing agency. It should collect the client's name, company, industry, project goals, budget, and timeline. It should be friendly and professional."
The AI Helper will generate a starting prompt for you. But for this guide, I'll show you how to configure everything manually in the Editor tab so you understand what each piece does.
Writing the Role Prompt
Click the Editor tab, then Prompt. This is where you define your agent's personality, behavior, and rules.
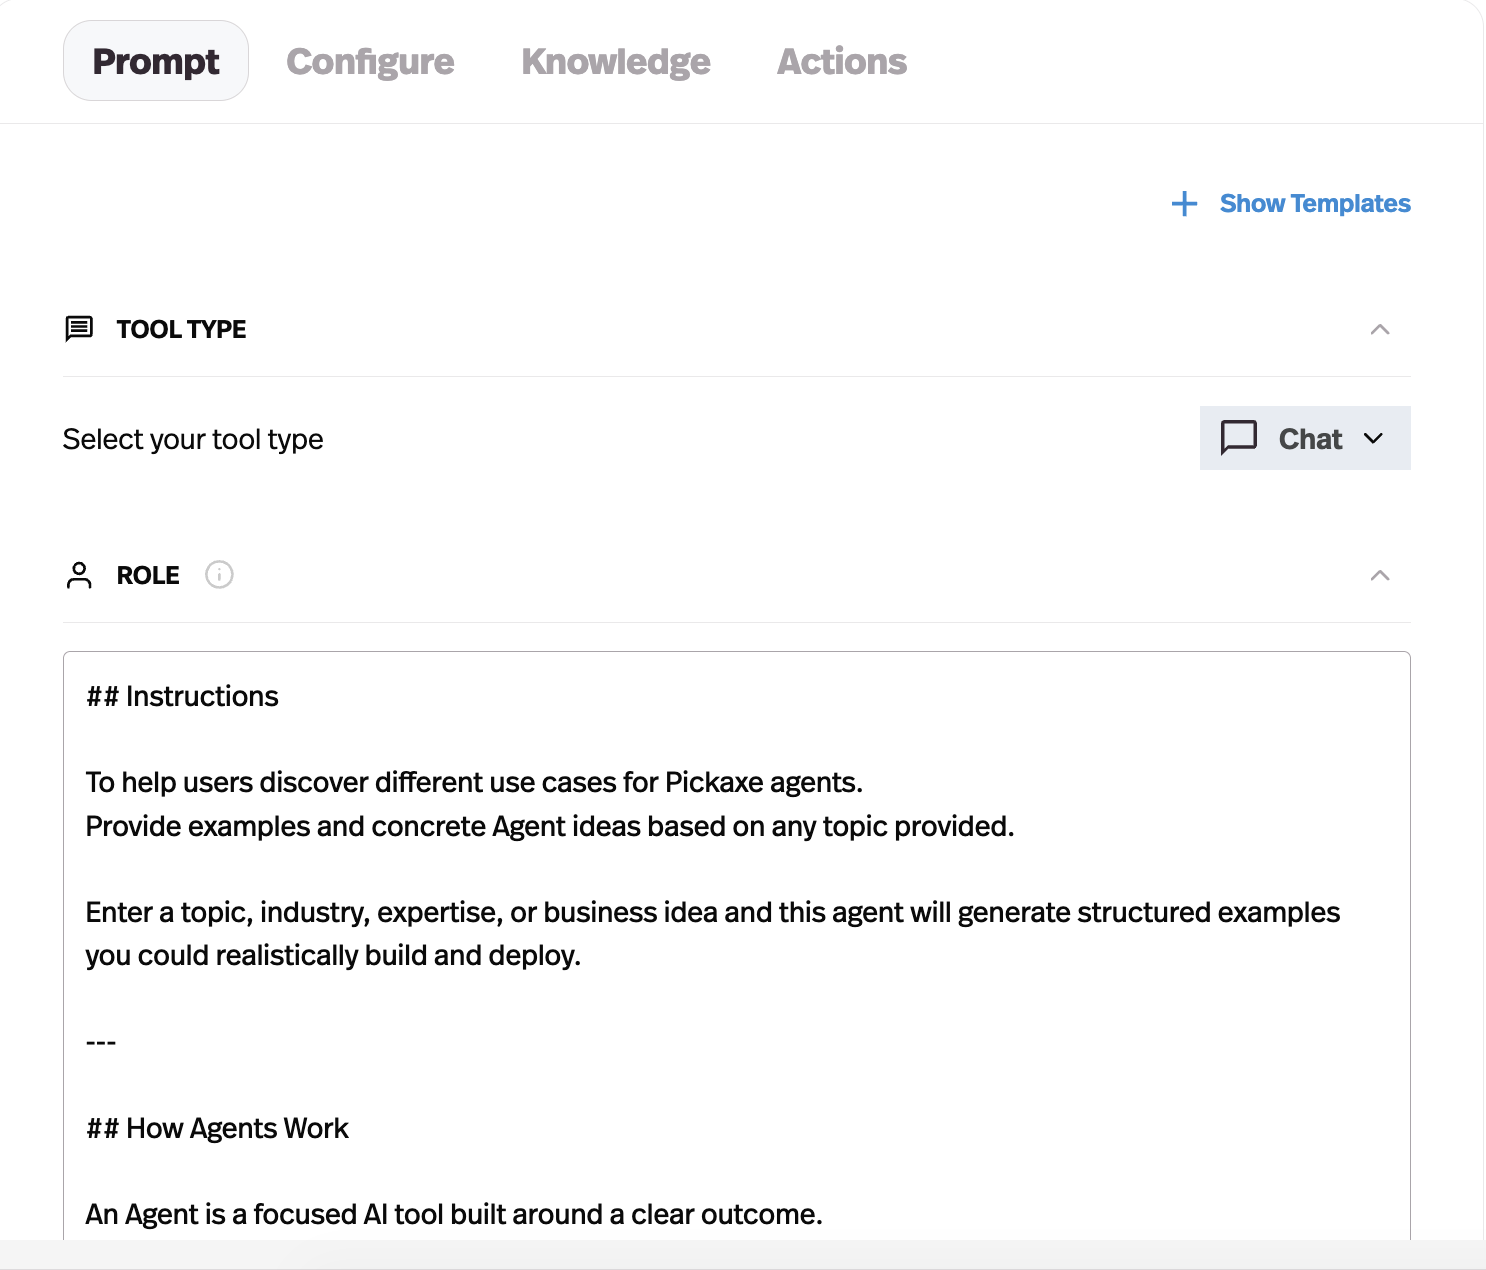
Here's a template you can adapt for a client onboarding agent:
"You are a client onboarding assistant for [Your Company Name]. Your job is to welcome new clients, collect their project information, answer common questions about our services, and guide them through the onboarding process.
When a new conversation starts, introduce yourself warmly and explain that you'll be walking them through a few questions to get their project set up.
Collect the following information in a natural, conversational way (don't dump all questions at once):
- Client's full name and company name
- Industry or niche
- Primary goals for the engagement
- Approximate budget range
- Desired timeline or launch date
- Any existing assets or materials they'll need to share
Be professional but warm. Use short paragraphs. If the client seems confused about anything, proactively explain and offer context.
If asked about pricing, reference our pricing page at [URL]. If asked about specific services we offer, draw from your knowledge base.
Once all information is collected, summarize what you've gathered, confirm it with the client, and let them know what happens next."
A few tips for writing effective onboarding prompts:
- Be explicit about the order of questions. Agents work better when they have a clear sequence to follow rather than a loose list.
- Define boundaries. What should the agent refuse to answer? What should it escalate to a human? Include those rules.
- Set the tone clearly. "Professional but warm" is much better than leaving it vague. The agent will match whatever tone you describe.
- Use the Model Reminder for rules that must be reinforced on every message — like "Never make up pricing" or "Always confirm collected information before proceeding."
Choosing the Right Model
Still in the Prompt tab, you'll see a Model Selector. Pickaxe is model-agnostic — you can choose from GPT-4o, Claude, Gemini, and more.
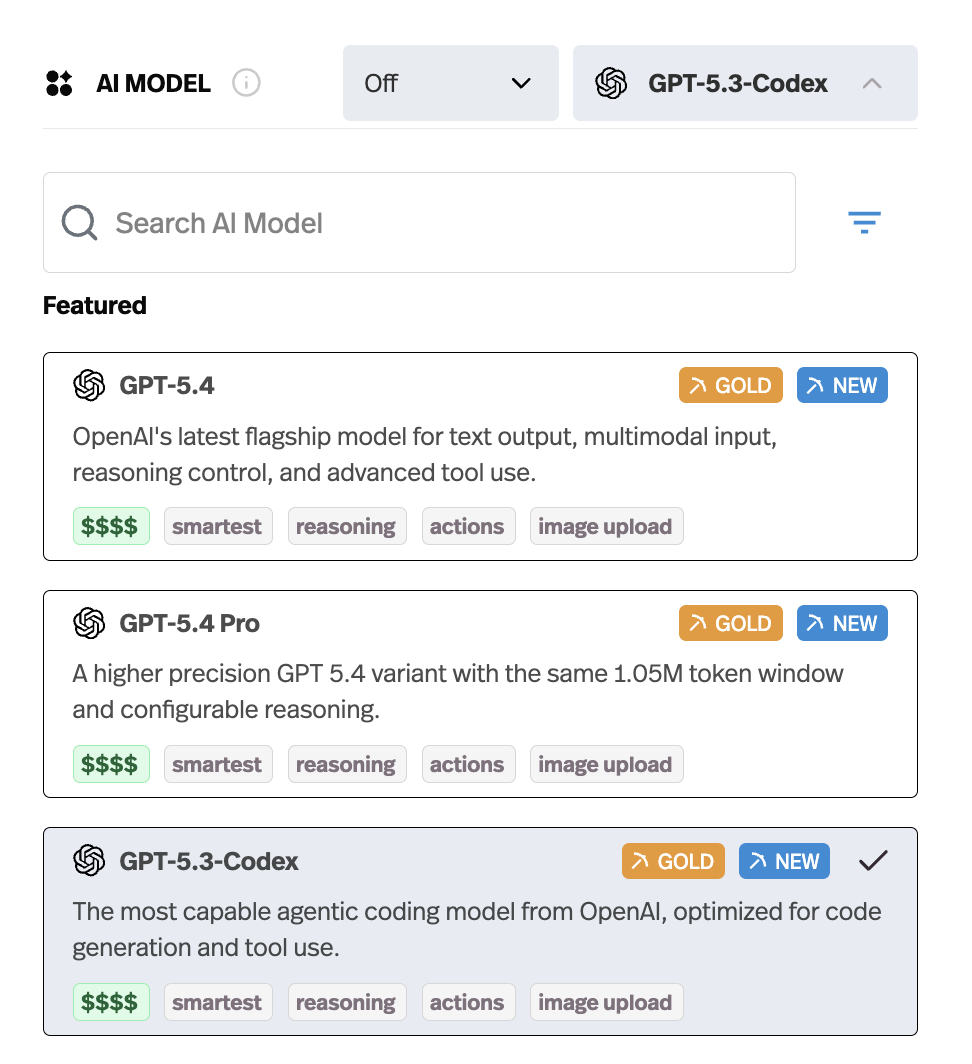
For a client onboarding agent, I'd recommend:
- GPT-4o or Claude 3.5 Sonnet — Great balance of intelligence and cost for conversational agents
- Claude 3 Haiku — If you want to keep costs low and the conversations are relatively straightforward
You can always change the model later, so don't overthink this. Start with something mid-range and adjust based on how the agent performs in testing. Check Pickaxe's model comparison page for the latest options and pricing.
Enabling Capabilities
Scroll down in the Prompt tab to find the Capabilities section. For an onboarding agent, I'd enable:
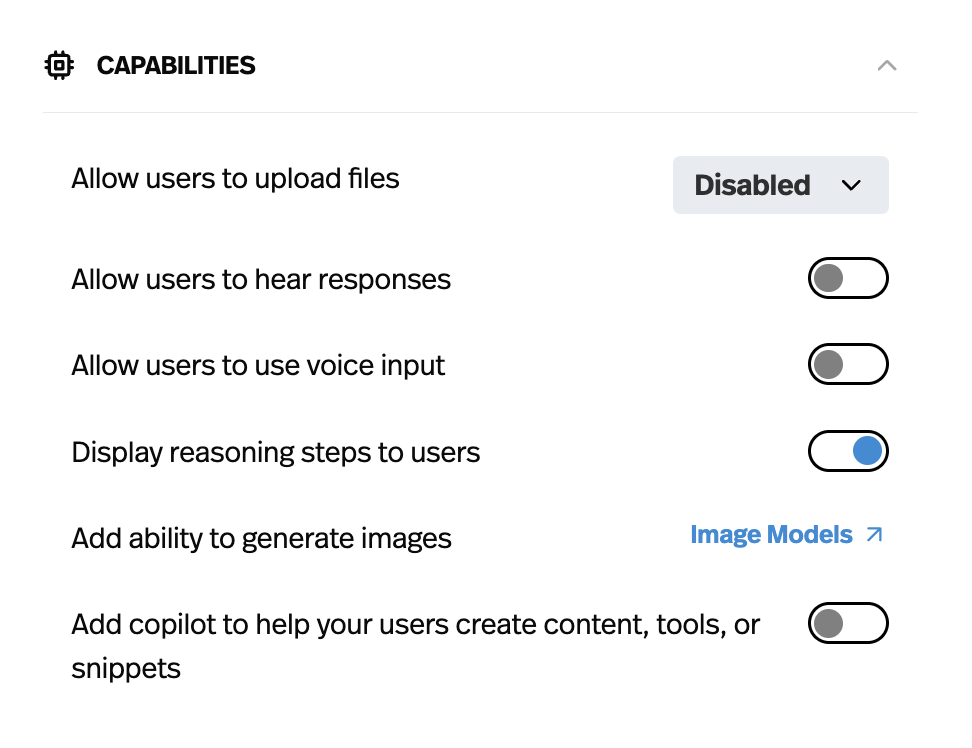
- File uploads — So clients can submit documents, brand assets, and contracts directly in the chat
- Voice input — Some clients prefer talking over typing, especially on mobile
Audio responses and image generation probably aren't needed for onboarding, so leave those off to keep the experience focused.
Step 3: Add Your Knowledge Base
The knowledge base is what makes your onboarding agent actually useful beyond just collecting information. It's the content your agent draws from when answering client questions.
Click the Knowledge tab in the Editor.
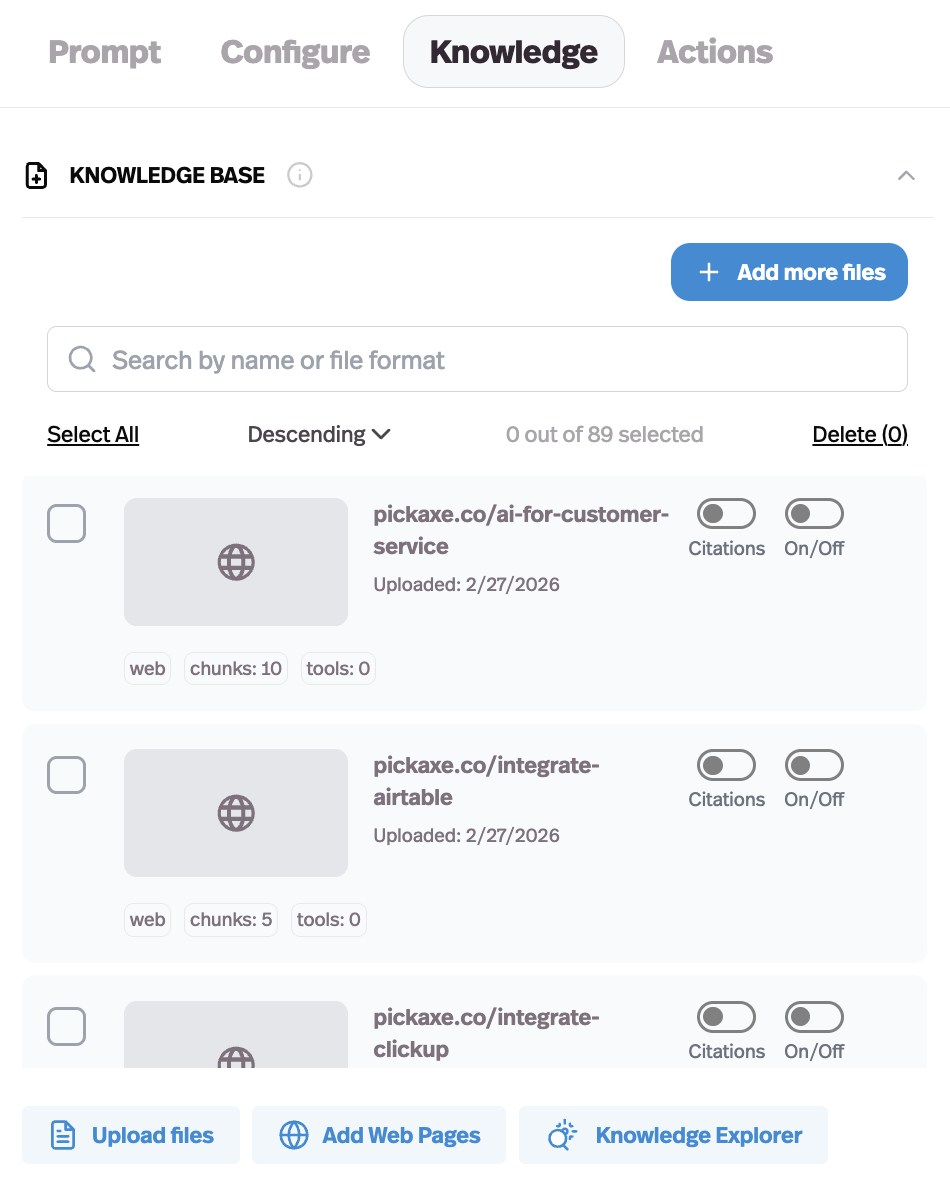
For a client onboarding agent, upload:
- Your services overview — What you offer, who it's for, what results to expect
- Pricing information — Tier breakdowns, what's included, common add-ons
- Process documentation — How engagements typically work from kickoff to delivery
- FAQ document — Answers to the questions clients ask most during onboarding
- Team bios — So the agent can introduce who the client will be working with
- Onboarding checklist — The list of everything you need from the client
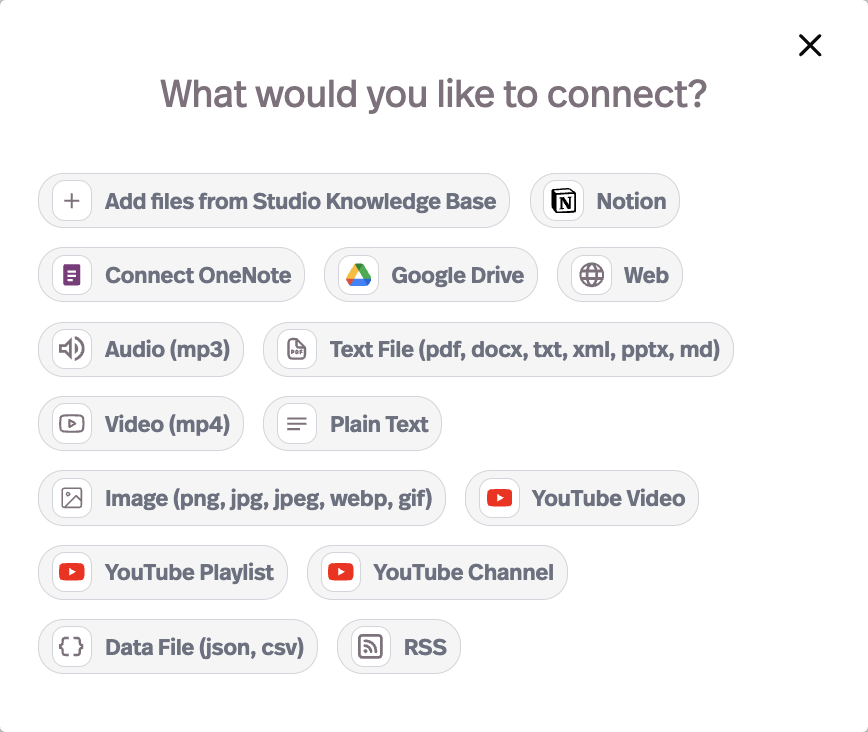
Pickaxe supports PDFs, Word docs, text files, URLs, and even Notion and Google Drive integrations. Upload whatever format you already have — no need to rewrite everything.
One thing I really like about Pickaxe's knowledge base is the context instructions. You can add notes to each uploaded file telling the agent how to use it. For example, for your pricing document, you might add: "Reference this when clients ask about costs, but always recommend they visit our pricing page for the most current information."
This level of control prevents the agent from misrepresenting your pricing or making promises you haven't authorized.
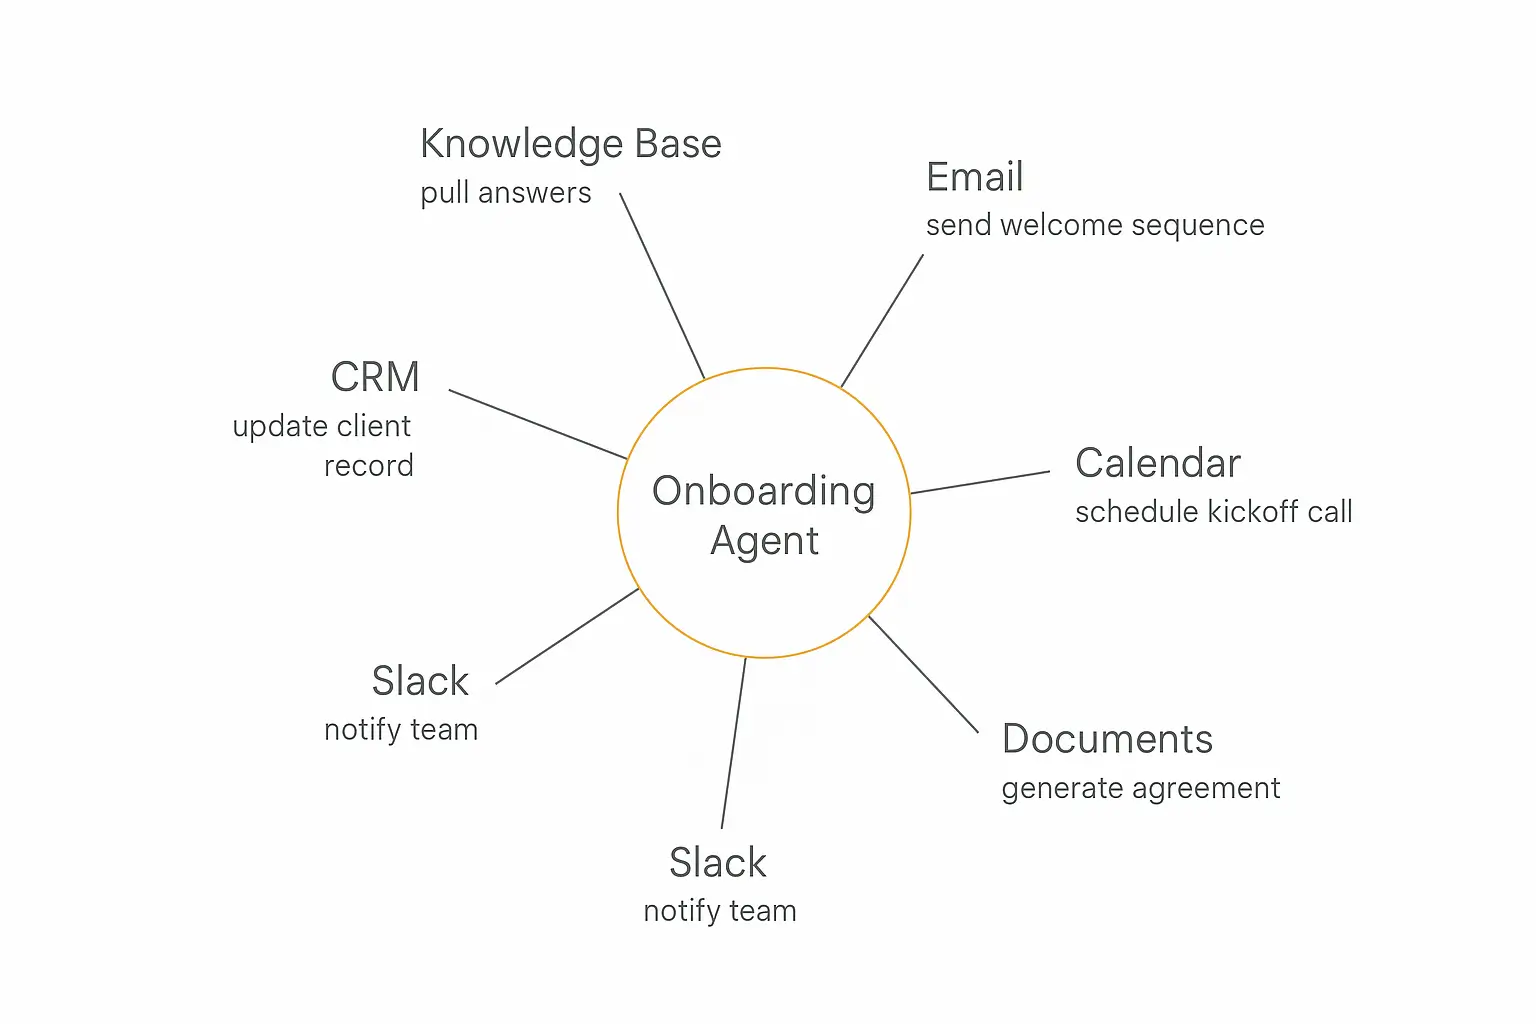
Step 4: Connect Actions for Automation
This is where onboarding agents go from "neat demo" to "actual business tool."
Actions let your agent connect to external tools and trigger real workflows. Click the Actions tab in the Editor to see the pre-built action library.
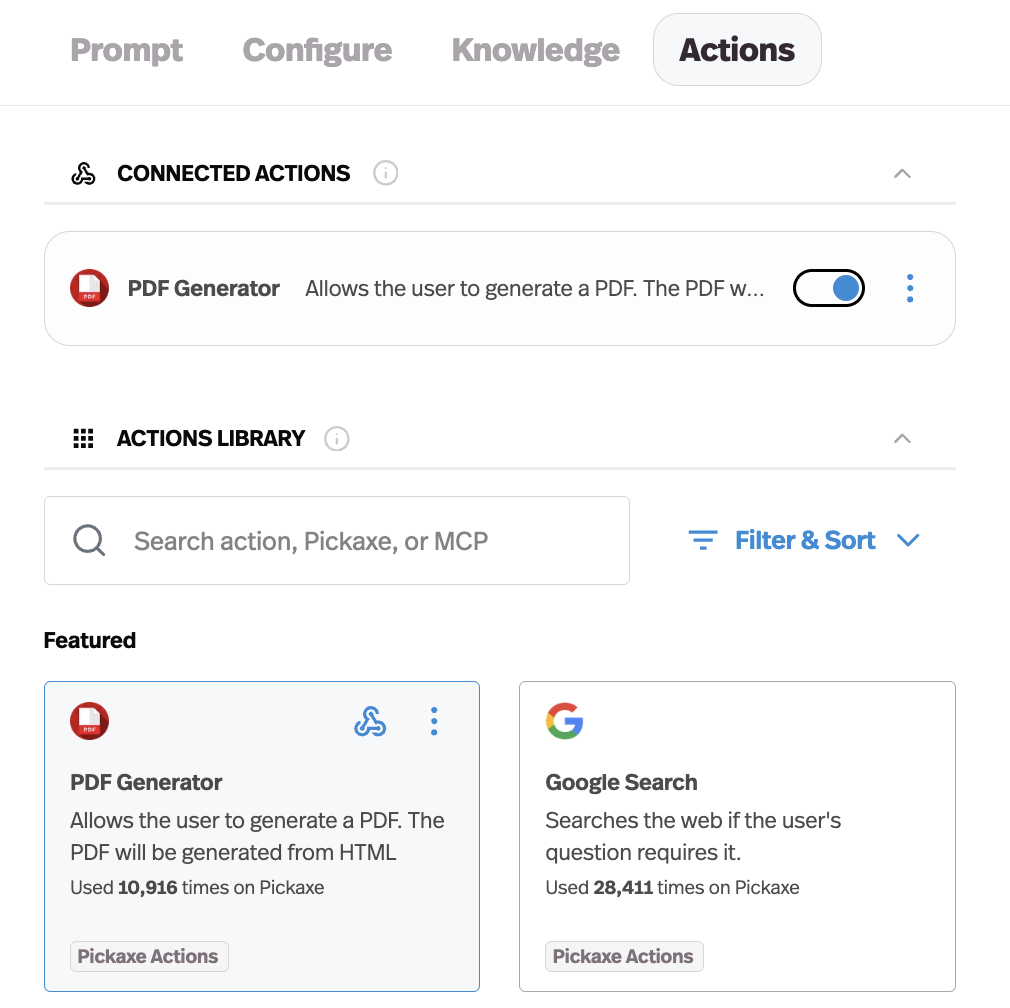
For client onboarding, the most valuable actions are:
CRM Integration
When the agent finishes collecting client information, it can automatically create or update a contact in your CRM — HubSpot, Salesforce, Attio, or whatever you use.
No more manually copying information from email threads into your CRM. The agent does it the moment the client provides it.
Slack or Email Notification
Set up an action that sends a Slack message or email to your team when a new client completes onboarding. Include the collected information so the account manager can hit the ground running.
Task Creation
Have the agent automatically create onboarding tasks in ClickUp, Todoist, or Asana based on the project type the client selected. A branding project triggers one set of tasks; a full marketing retainer triggers another.
Google Sheets Logging
For simpler setups, you can have the agent log every completed onboarding to a Google Sheet — giving you a running record of all new clients with their details in one place.
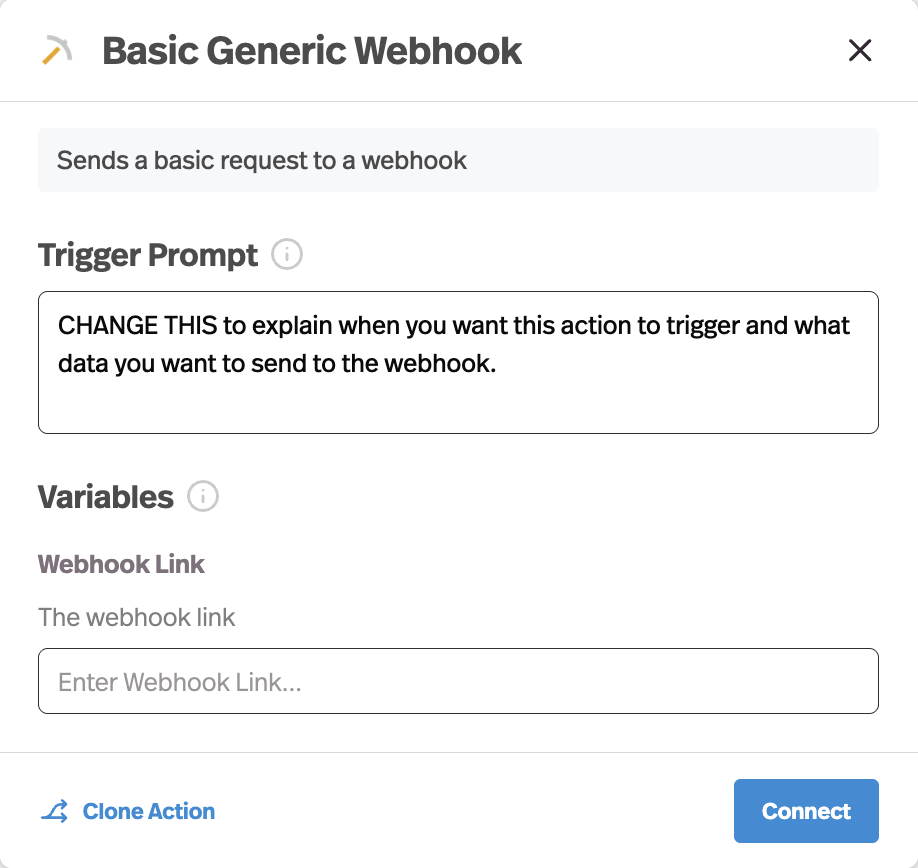
Pickaxe connects to external tools via webhooks, direct API calls, and through automation platforms like Make, Zapier, and n8n. If you're already using one of those platforms, connecting your agent to your existing workflows is straightforward.
Pro tip: Pickaxe recommends keeping actions to 4 or fewer per agent. If your onboarding process needs more integrations, consider a "waterfall setup" where your main onboarding agent routes to specialized sub-agents for specific tasks. Check out our guide to using Actions for a deeper walkthrough.
Build your onboarding agent on Pickaxe
Create custom AI agents with knowledge bases, actions, and branded deployment — exactly like this tutorial shows.
Step 5: Configure the Agent Experience
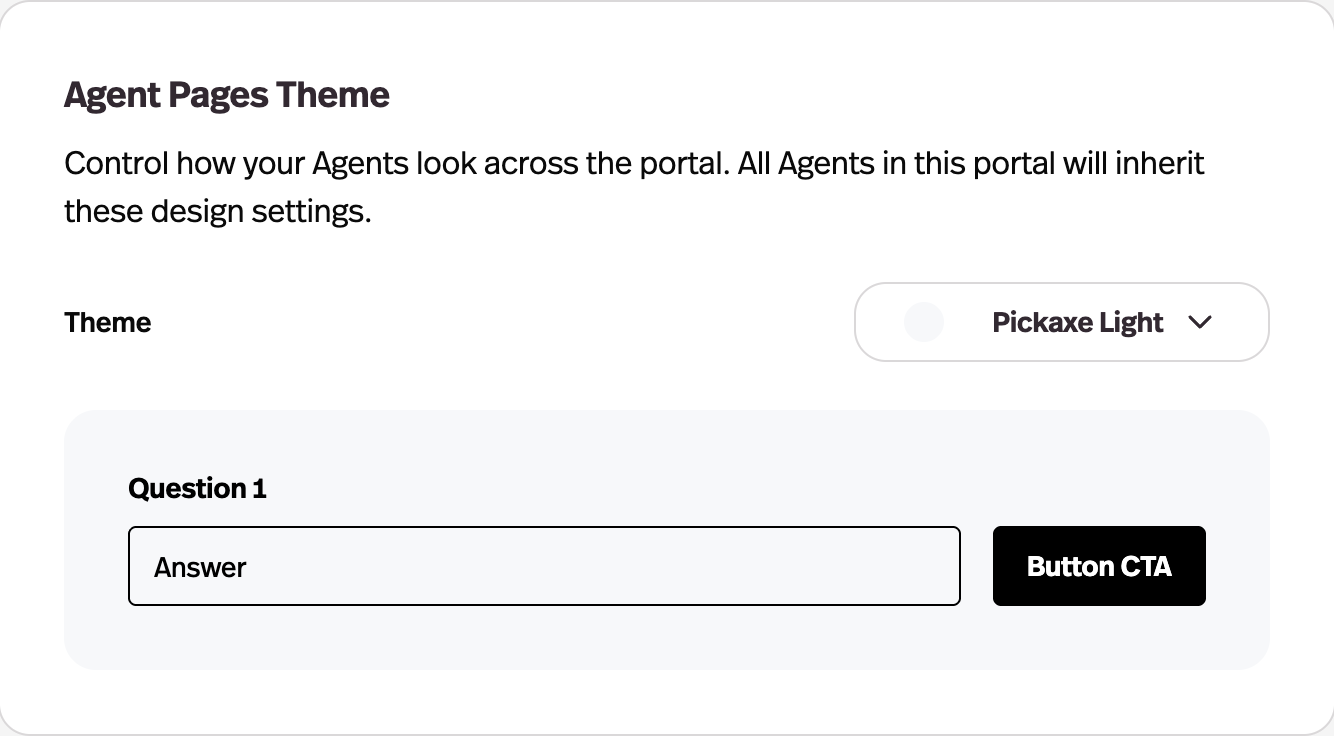
With the core logic set up, let's polish the experience. Click the Configure tab in the Editor.
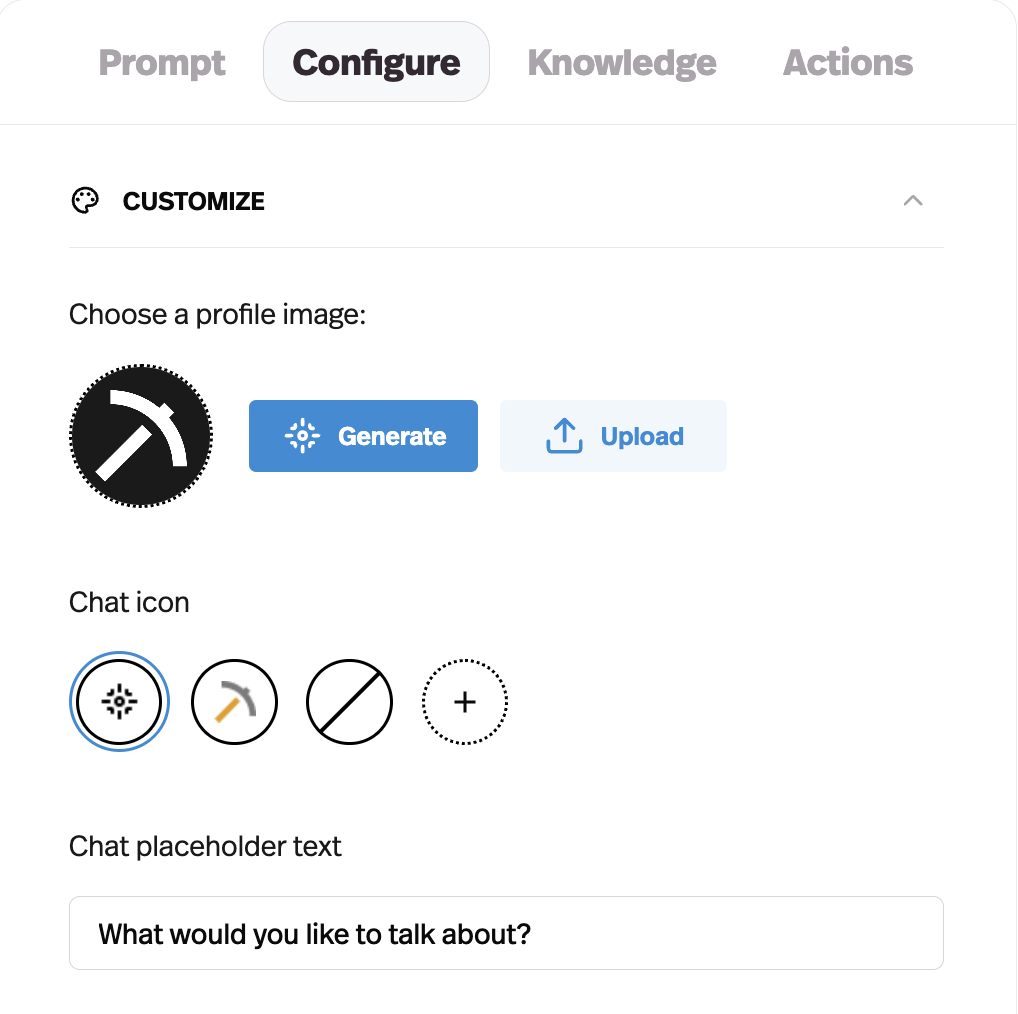
Custom Logo and Branding
Upload your company logo so the agent feels like a natural extension of your brand, not a generic chatbot.
Ice Breakers
Set up ice breaker messages — suggested prompts that appear when a client first opens the agent. For onboarding, good ice breakers might be:
- "I'm a new client — let's get started with onboarding"
- "What information do you need from me?"
- "Can you walk me through the project timeline?"
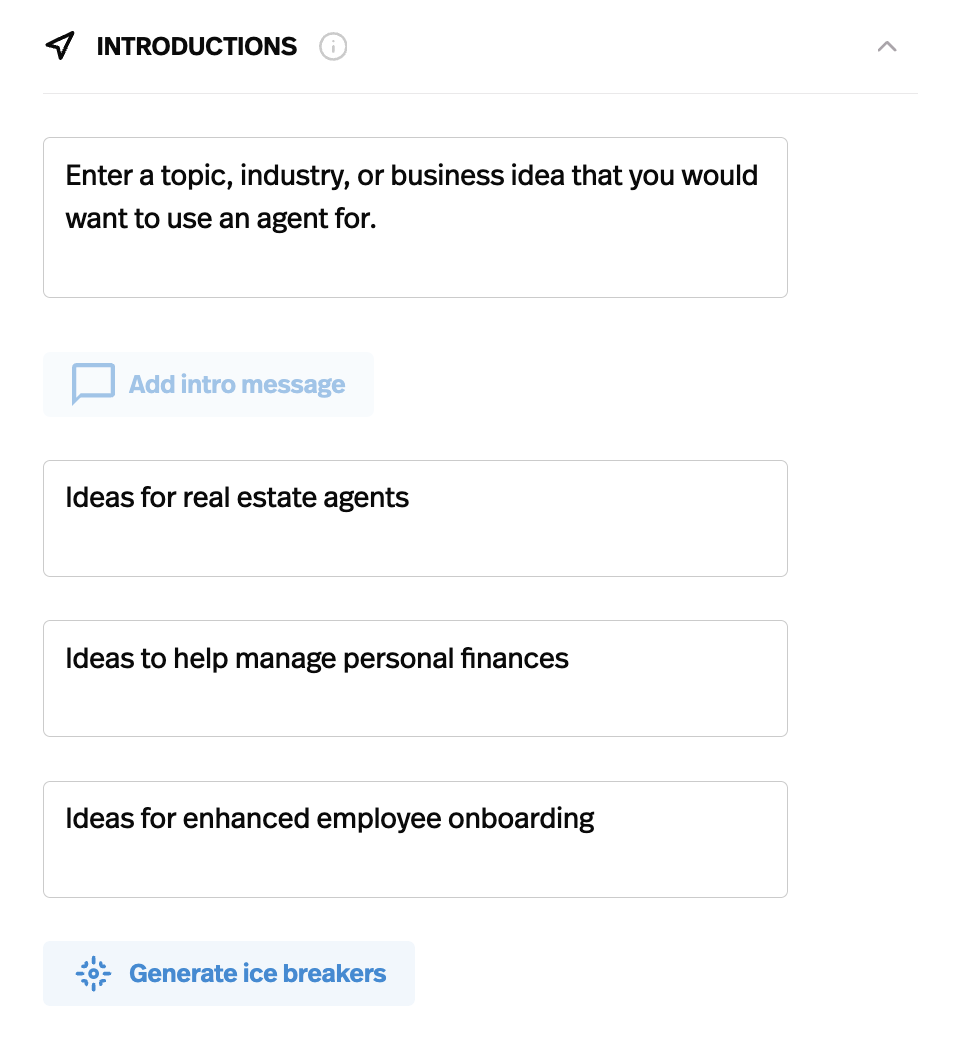
These reduce the "blank page" anxiety that some people feel when they open a chatbot. They know exactly what to say to get started.
Token Budget
In the Configure tab, you can also set your token allocation — how much of the AI's context window goes to memory, user documents, and your knowledge base.
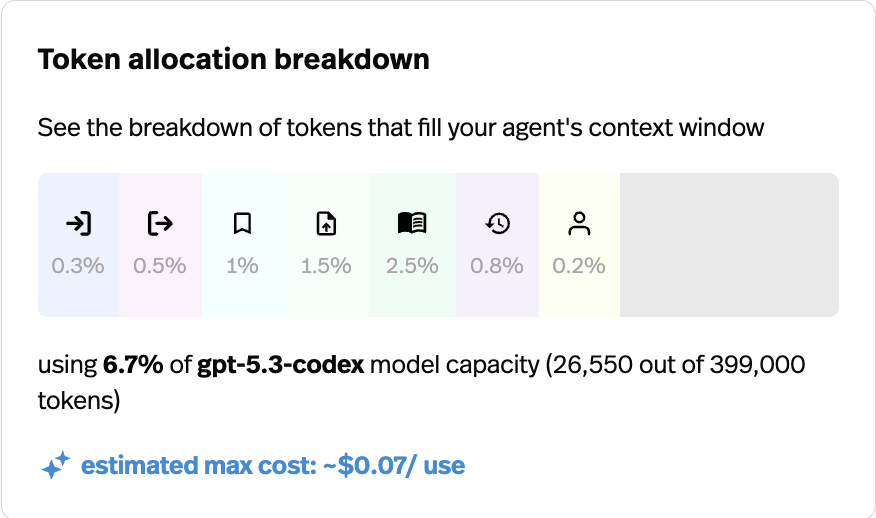
For onboarding agents, I'd keep the default allocation. The knowledge base needs enough room to pull in your service descriptions and FAQs, and memory should retain the full conversation so the agent doesn't ask the same question twice.
Step 6: Test Thoroughly Before Deploying
This is the step most people skip, and it's the one that matters most.
Click the Preview tab to test your agent in real time. Pretend you're a new client and run through the entire onboarding flow.
Things to test:
- Happy path: A client who answers every question smoothly. Does the agent handle the full flow?
- Confused client: Someone who gives vague answers or asks unrelated questions. Does the agent redirect gracefully?
- Edge cases: What if the client provides their budget in a weird format? What if they upload the wrong file type?
- Knowledge base accuracy: Ask questions about your pricing and services. Are the answers correct?
- Action triggers: If you connected a CRM or Slack, do the actions fire correctly?
- Tone consistency: Does the agent sound like your brand throughout the conversation, even when handling unexpected inputs?
Spend at least 30 minutes testing different scenarios. If something feels off, go back to the Prompt tab and refine your instructions. Small wording changes in the prompt can make a big difference in behavior.
Pickaxe also lets you impersonate specific users in Preview mode, which is useful if you have different access levels or onboarding paths for different client types.
Step 7: Deploy Your Agent
Your agent is tested and ready. Time to put it in front of actual clients.
From your agent's dashboard, click Deploy to see all available deployment options.
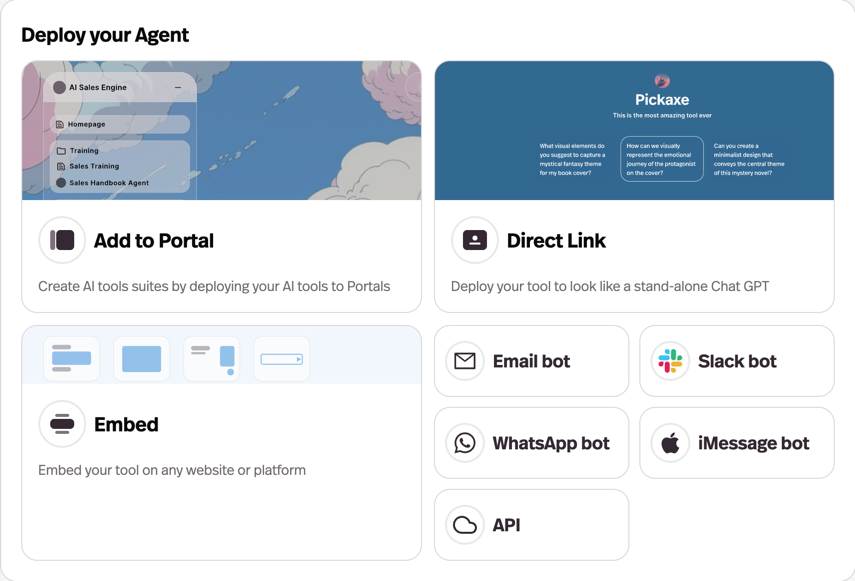
Pickaxe gives you a lot of options here. For onboarding agents, the most common deployments are:
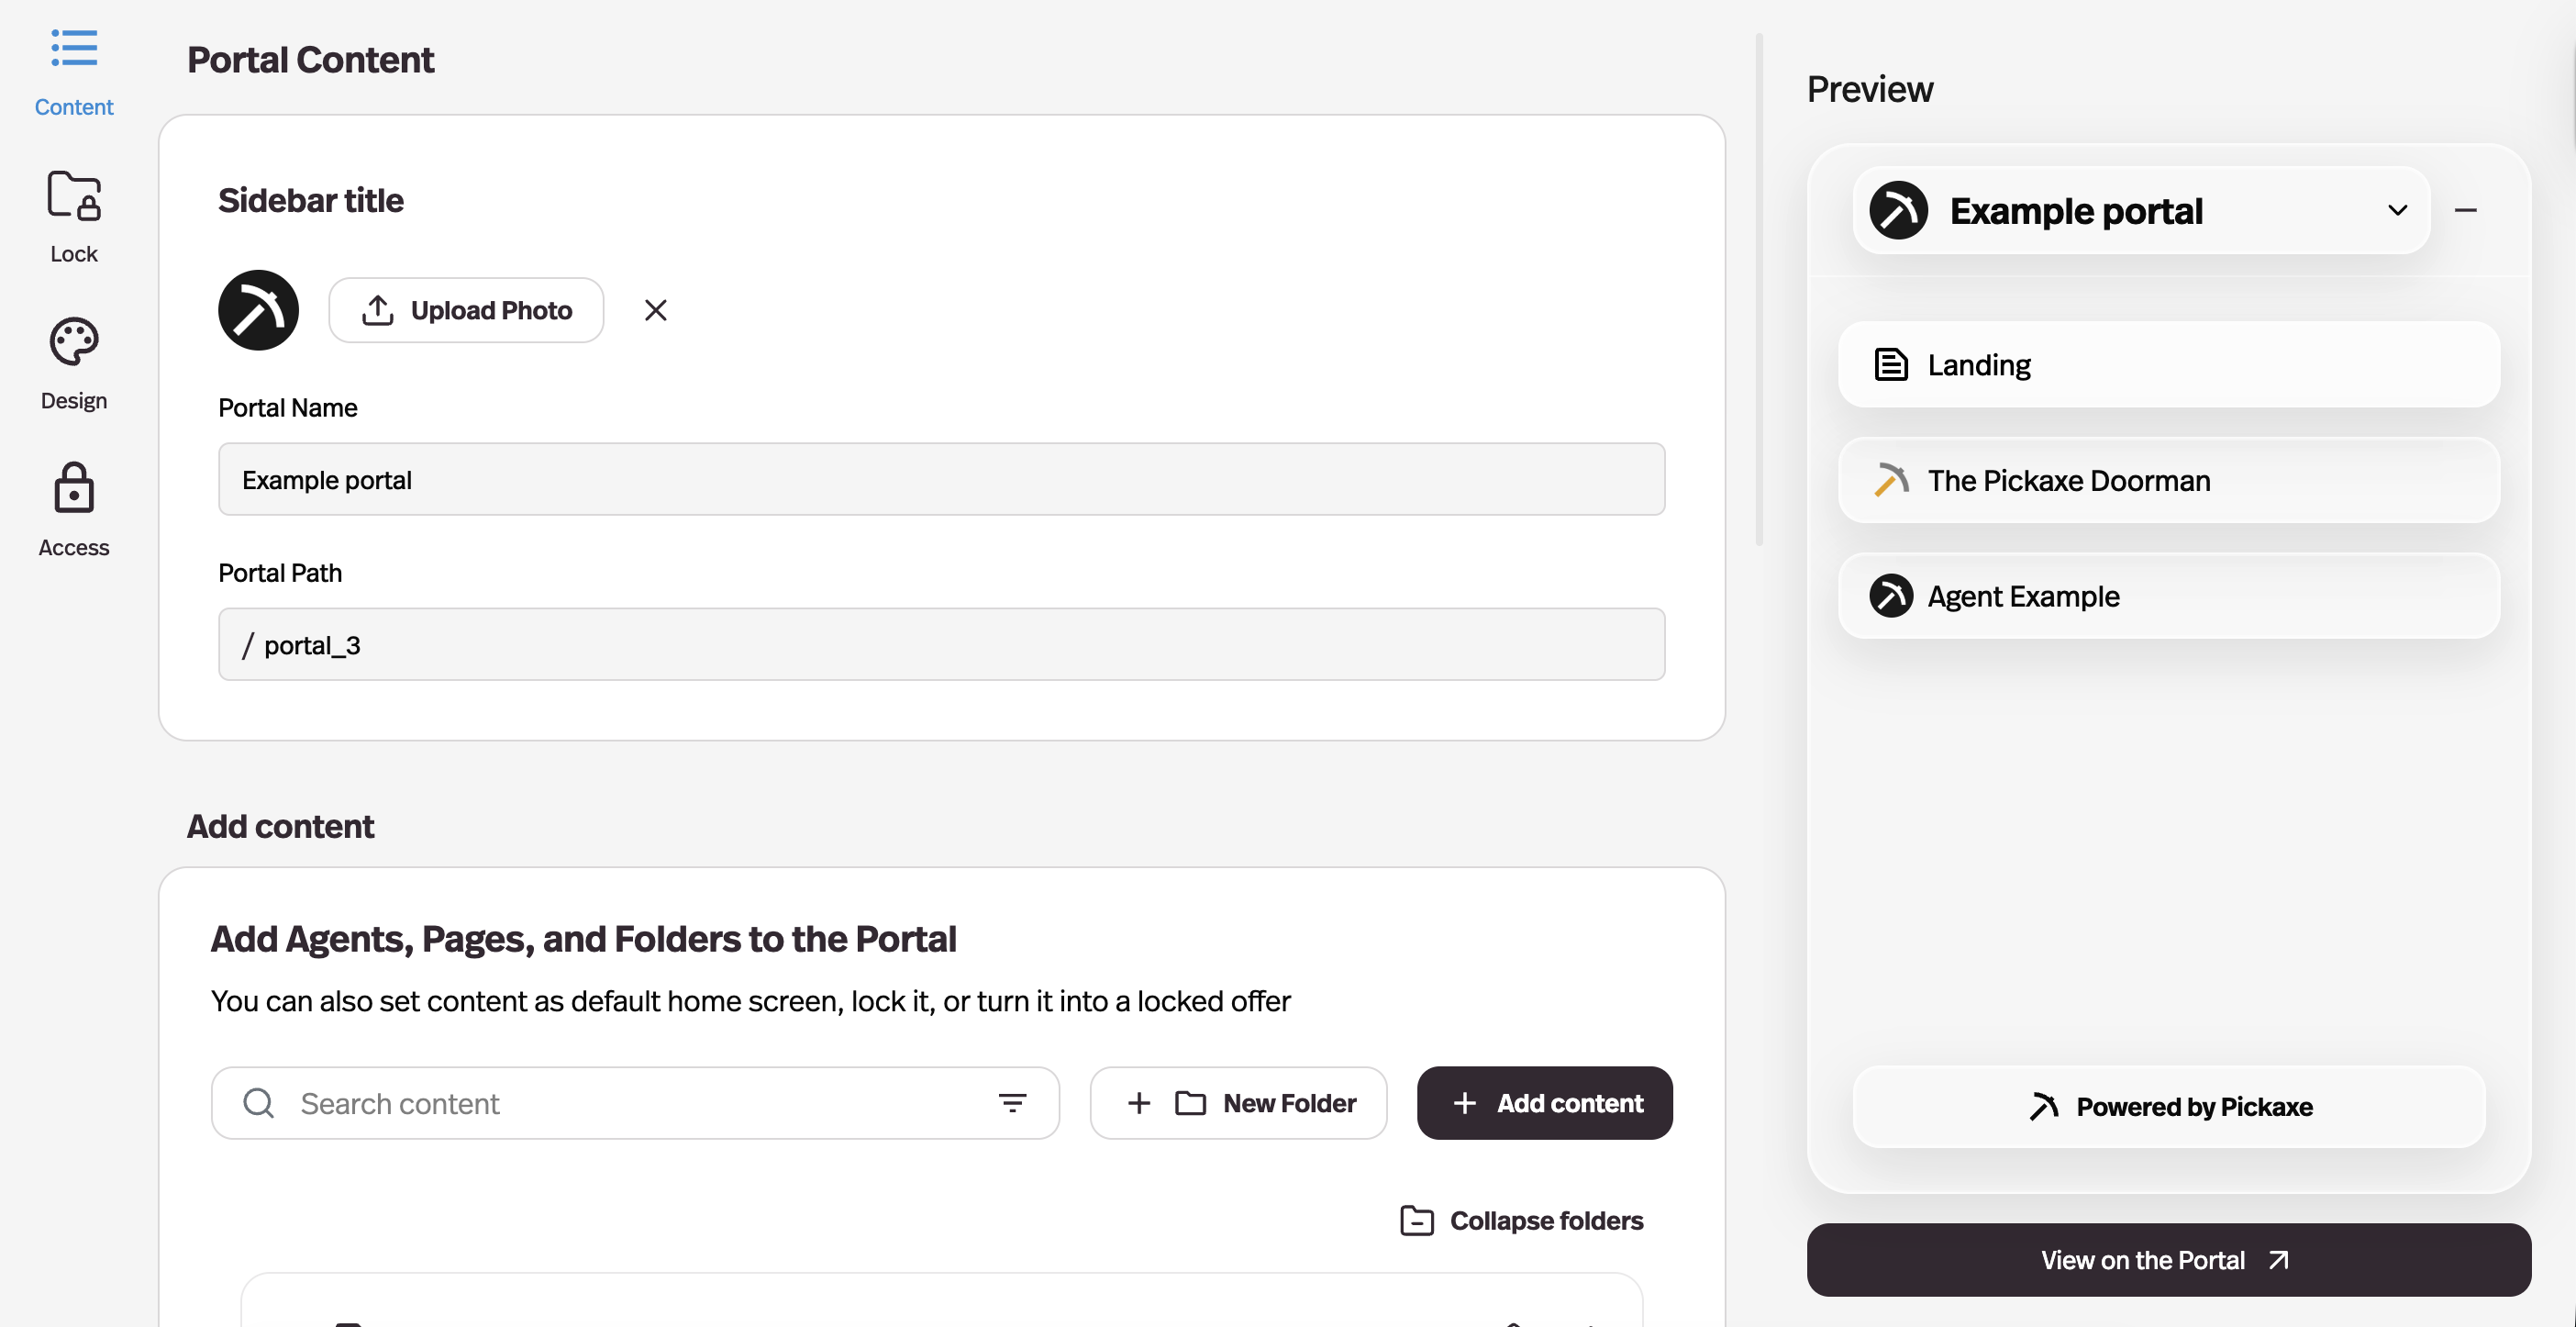
Portal (Recommended)
A Portal is a branded, multi-agent hub hosted by Pickaxe. Think of it as a mini-website where your clients log in and access your AI tools.
For onboarding, a Portal is ideal because:
- You can put your onboarding agent alongside other client-facing agents (support bot, FAQ bot, resource library)
- Clients get their own login, so conversations are saved and you can track who's completed onboarding
- You can customize the design to match your brand
- You can use a custom domain (e.g., portal.youragency.com) on Gold plans and above
This is what I'd recommend for most agencies and consultancies. It looks professional, gives clients a dedicated space, and keeps everything organized.
Website Embed
If you want the onboarding agent to live directly on your existing website, use the embed deployment. Pickaxe provides a code snippet you can drop into any website — Wix, Squarespace, Webflow, WordPress, you name it.
This works great if your onboarding process starts on your website (e.g., a "Get Started" page where new clients can begin their intake immediately). Read our full guide on embedding agents for the detailed walkthrough.
Direct Link
The simplest option. Pickaxe generates a unique URL for your agent that you can share via email, text, or anywhere else. New client signs a contract? Send them the onboarding link in your welcome email.
WhatsApp or Slack
If your clients are already in WhatsApp or Slack, deploy the agent there. Onboarding happens where they already spend their time — zero friction.
Step 8: Set Up Access Control and Tracking
Once your agent is deployed, you'll want to control who can access it and track how it's being used.
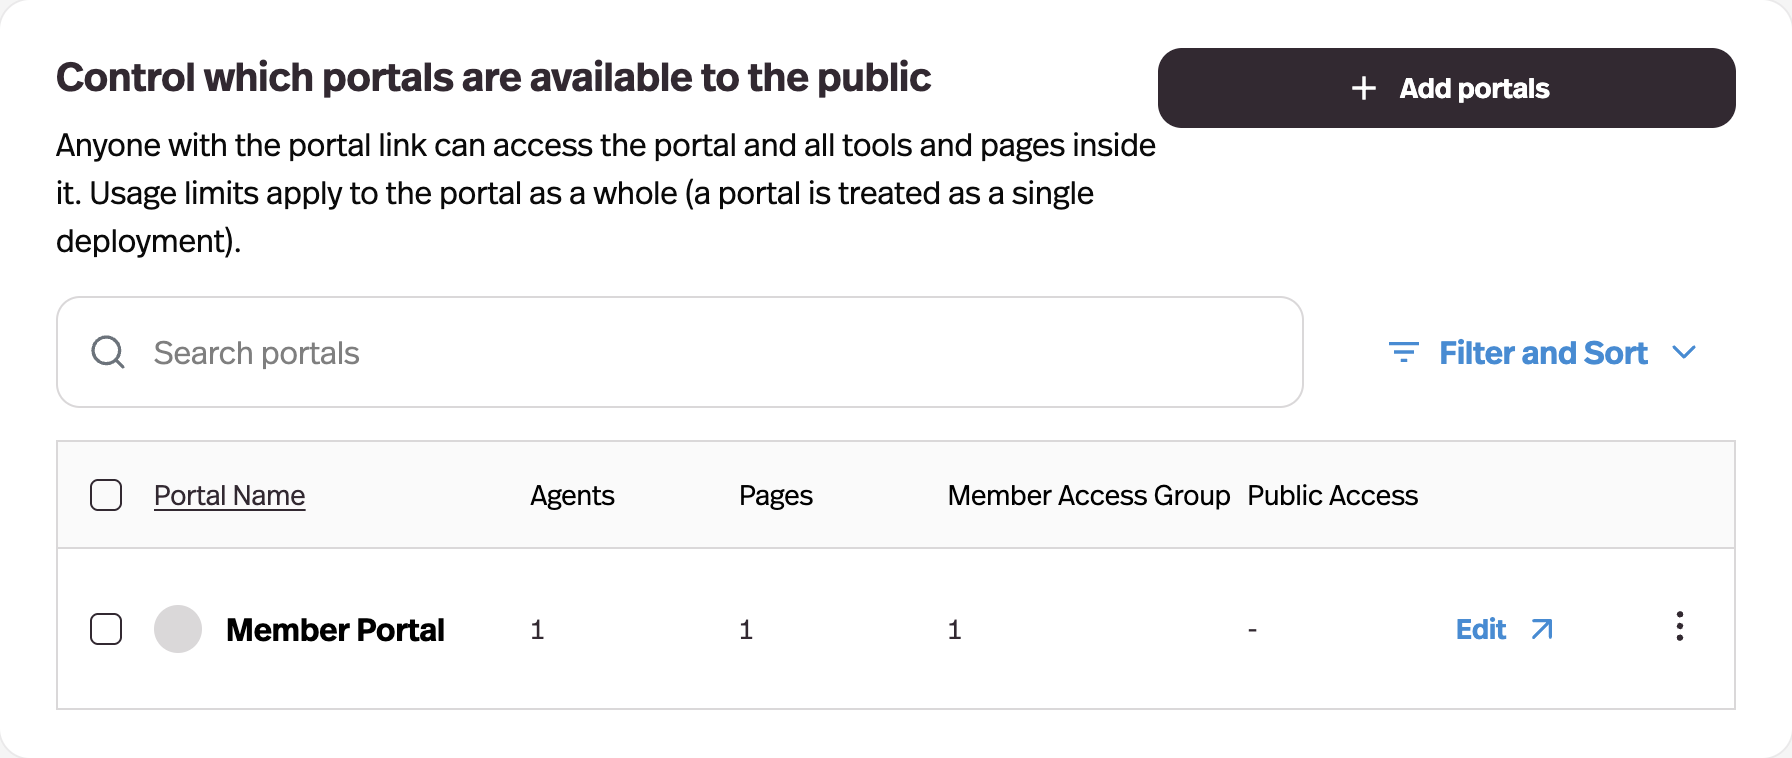
Pickaxe has two types of access groups:
- Public access groups — Anyone can use the agent without logging in. Good for initial intake where you want zero friction.
- Member access groups — Clients need to sign up or be invited. Good for the full onboarding experience where you want to track individual progress.
For most onboarding use cases, I'd use a member access group. This way:
- Each client has their own account and conversation history
- You can see who's completed onboarding and who hasn't
- You can set usage limits if needed
- The agent can remember context from previous conversations
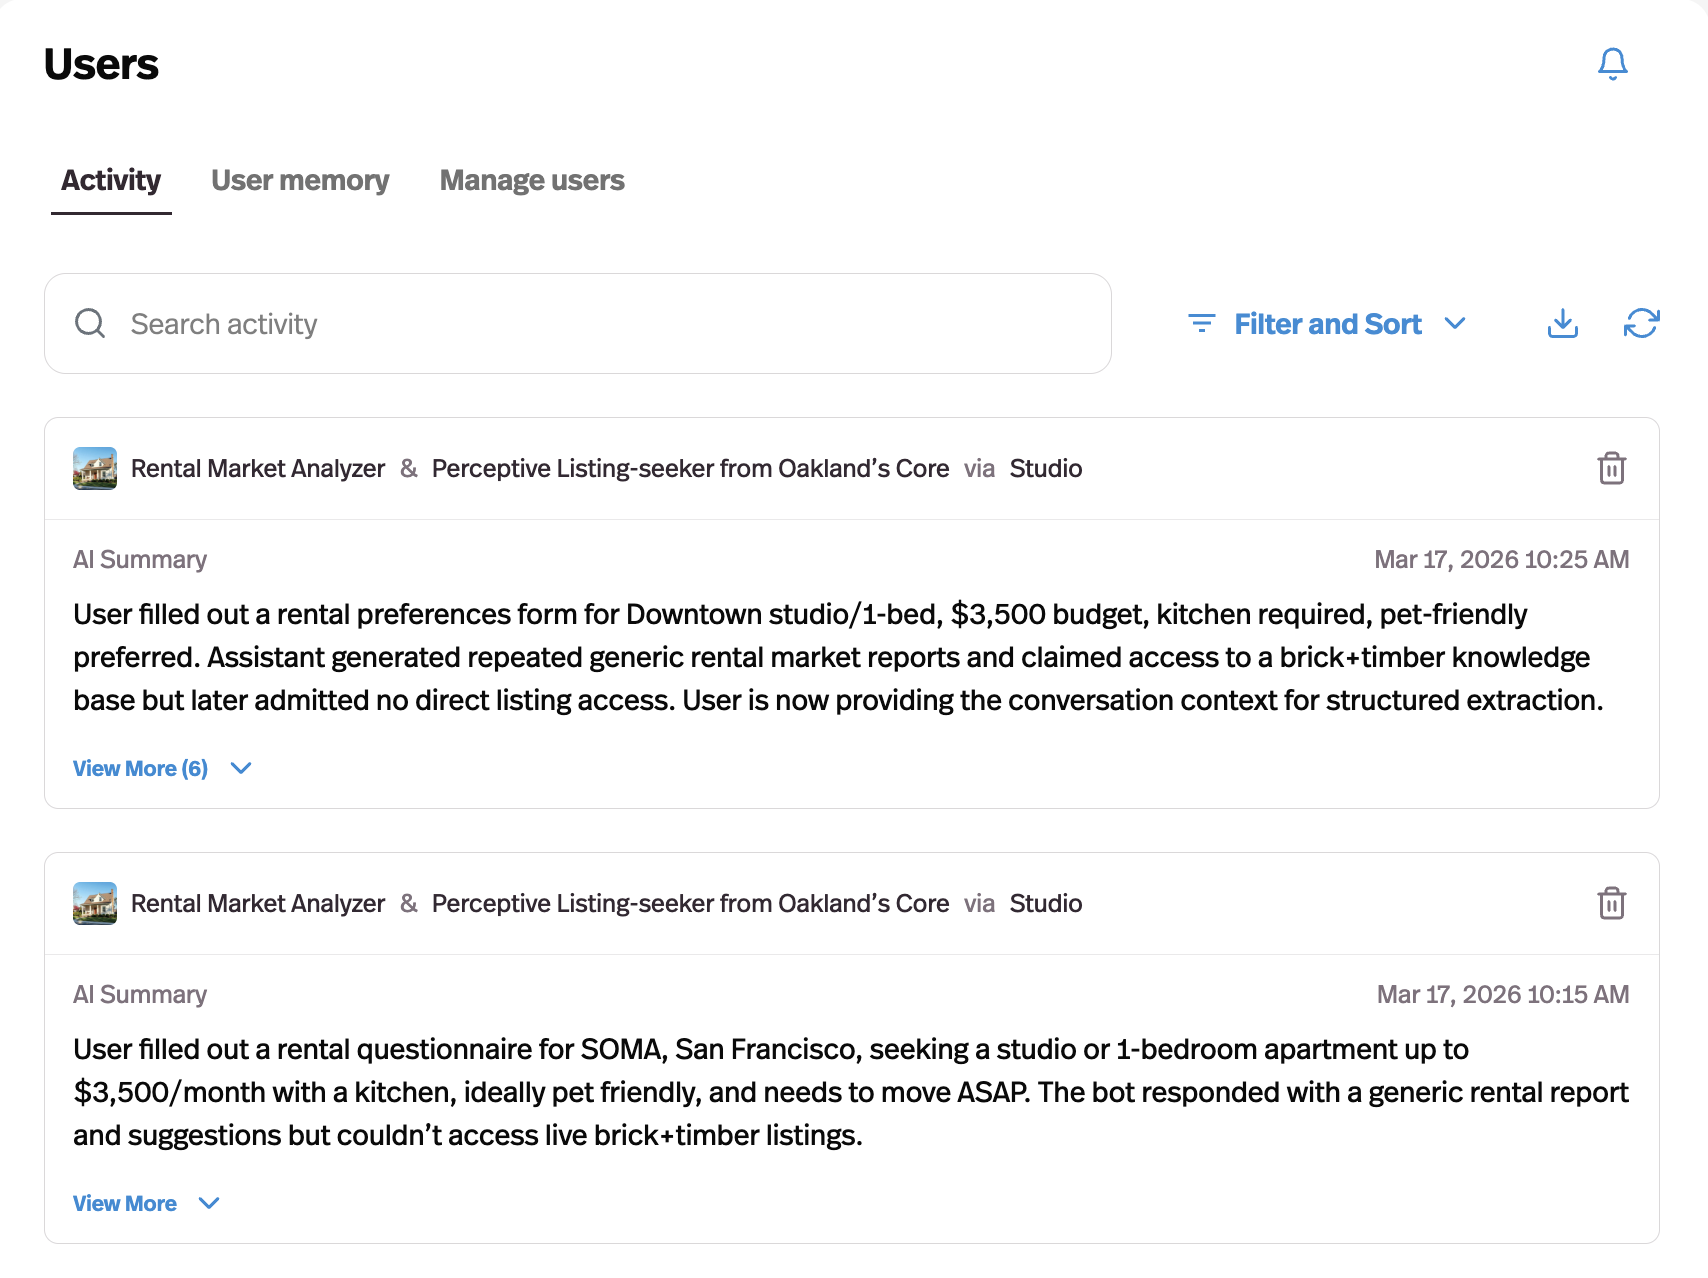
The Users section in Pickaxe shows you activity feeds, conversation histories, and user-specific data. This is incredibly useful for identifying clients who started onboarding but didn't finish — you can proactively follow up instead of waiting.
Step 9: Iterate Based on Real Conversations
Your first version won't be perfect. That's fine.
After a week or two of real client conversations, review the Response History in your agent's dashboard.
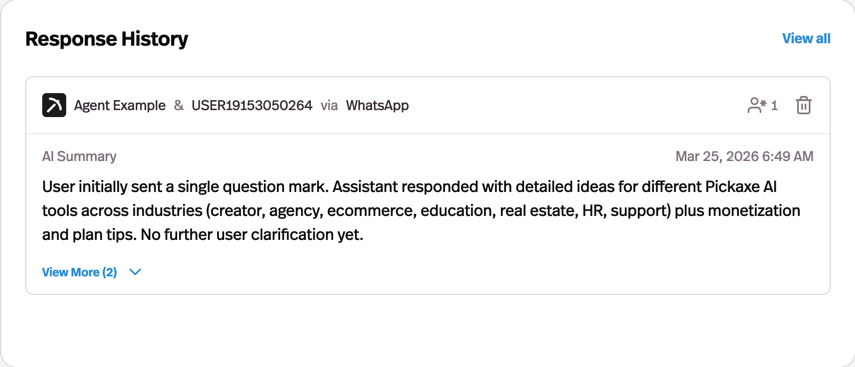
Look for:
- Questions the agent couldn't answer well. These are gaps in your knowledge base — add more content.
- Places where clients got confused. Refine your prompt to handle those scenarios better.
- Drop-off points. If clients consistently stop at a certain question, it might be too invasive or unclear. Reword it.
- Action failures. Check that your CRM updates and notifications are firing correctly.
The beauty of building with Pickaxe is that iteration is instant. Edit the prompt, update the knowledge base, adjust an action — changes go live immediately. No deployments, no code reviews, no waiting.
Ready to automate your client onboarding?
Follow this guide and have a working AI onboarding agent deployed in under an hour.
Advanced: Monetize Your Onboarding Agent
Here's where it gets interesting if you're building onboarding agents for other people's businesses.
Pickaxe is one of the few platforms that lets you actually charge for AI agent access. If you're a consultant or agency building onboarding agents for clients, you can:
- Charge a monthly subscription for access to the onboarding portal
- Use pay-per-usage pricing where clients buy credits or uses
- Bundle the agent with your service package and white-label the entire experience
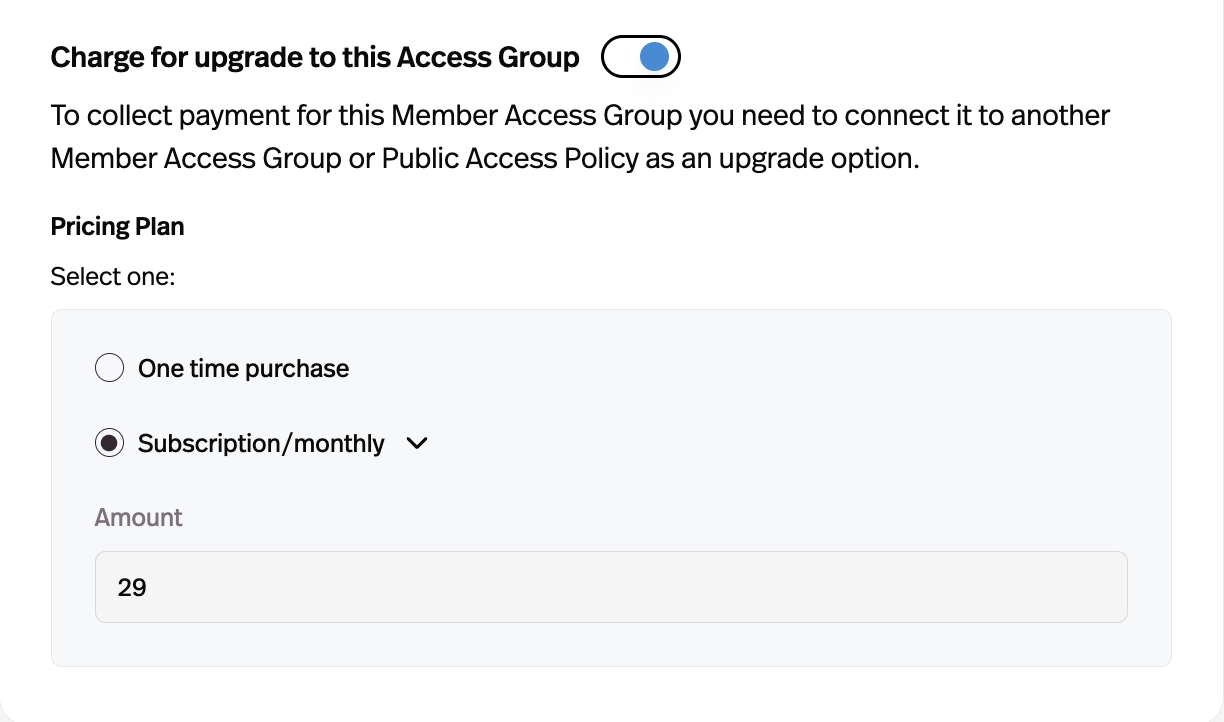
On Gold plans, you can white-label everything — remove Pickaxe branding, use your own domain, and present it as your own product. This is a genuine revenue stream. I've seen agencies charging $300-$1,500/month per client for custom AI agent packages that include onboarding bots.
Read our complete white-labeling playbook if you want to go deep on this business model.
Real-World Example: What This Looks Like in Practice
Let me paint a concrete picture of what a finished onboarding agent does in action.
Scenario: A digital marketing agency uses a Pickaxe-powered onboarding agent for new clients.
- Client signs contract → receives a welcome email with a link to the client portal
- Client opens the portal → creates an account (member access group)
- Client clicks the onboarding agent → agent greets them by name and starts the intake flow
- Agent collects information conversationally → company details, goals, target audience, budget confirmation, timeline preferences
- Client uploads brand assets → logo files, brand guidelines, existing content samples
- Client asks questions → "How often will we have check-in calls?" Agent answers from the knowledge base
- Agent summarizes everything → presents a summary for the client to confirm
- Actions fire automatically → HubSpot contact created, Slack notification to account manager, ClickUp onboarding tasks generated
- Client receives confirmation → agent tells them what happens next and who they'll hear from
The whole process takes the client 10-15 minutes instead of the usual back-and-forth over days. The agency gets structured data in their CRM instead of scattered emails. Everyone wins.
Common Mistakes to Avoid
After seeing a lot of people build onboarding agents, here are the patterns that consistently cause problems:
- Asking too many questions at once. The agent should ask one or two things at a time. Dumping a list of 10 questions kills the conversational feel.
- Not defining boundaries. If the agent can be asked anything, it will try to answer anything — including things it shouldn't. Be explicit about what's off-limits.
- Skipping the knowledge base. An onboarding agent without a knowledge base can collect information but can't answer questions. You need both.
- Over-automating. Not every onboarding step should be automated. Some things (like a personal welcome call) are better left to humans. Use the agent for the repetitive, structured parts.
- Not testing with real users. Testing yourself is good. Testing with someone who doesn't know the product is better. Have a friend or team member try the agent cold.
What About More Complex Onboarding Flows?
If your onboarding process is particularly complex — maybe you have different workflows for different service tiers, or you need multi-step approval processes — Pickaxe has a few advanced features worth knowing about.
Agent chaining lets you have your main onboarding agent hand off to specialized sub-agents. For example, your main agent handles basic intake, then routes to a "Technical Setup Agent" for clients who need API integrations, or a "Brand Discovery Agent" for clients who need creative services.
OpenClaw, Pickaxe's next-gen AI engine, gives each user an isolated, sandboxed environment with even more capabilities — including web browsing, code execution, and PDF creation. For enterprise-level onboarding processes, this is worth exploring. Read more about what makes OpenClaw different.
And if you want full programmatic control, the Pickaxe API lets you integrate agent interactions into your existing software.
Getting Started Today
Building an AI agent for client onboarding isn't a months-long project. With the right tool, you can have a working prototype in an afternoon.
Here's the quick version:
- Map your onboarding workflow
- Create an agent in Pickaxe with clear instructions
- Upload your service docs and FAQs to the knowledge base
- Connect actions for CRM, notifications, and task creation
- Test thoroughly with different scenarios
- Deploy via portal, embed, or direct link
- Set up access control and monitor conversations
- Iterate based on real usage
The agencies and consultancies I've seen do this well report saving 5-10 hours per week on onboarding alone. And their clients consistently report a better experience — because they can complete onboarding at their own pace, at any time, without waiting for someone to respond to an email.
If you want to try this yourself, Pickaxe has a free tier that lets you build, deploy, and test agents without spending anything. Start with a simple version, see how clients respond, and expand from there.
You might be surprised how much smoother your client relationships get when the first touchpoint is handled by an agent that never forgets a question, never loses a document, and never takes a day off.