Embedding AI agents in your website
In this guide, we'll show you exactly how to embed AI agents and chatbots into a website, step by step — using Pickaxe's current embed system.
Businesses everywhere are racing to add AI to their sites. The most creative ones are deploying intelligent agents to deliver customer support, qualify leads, and answer FAQs in real time.
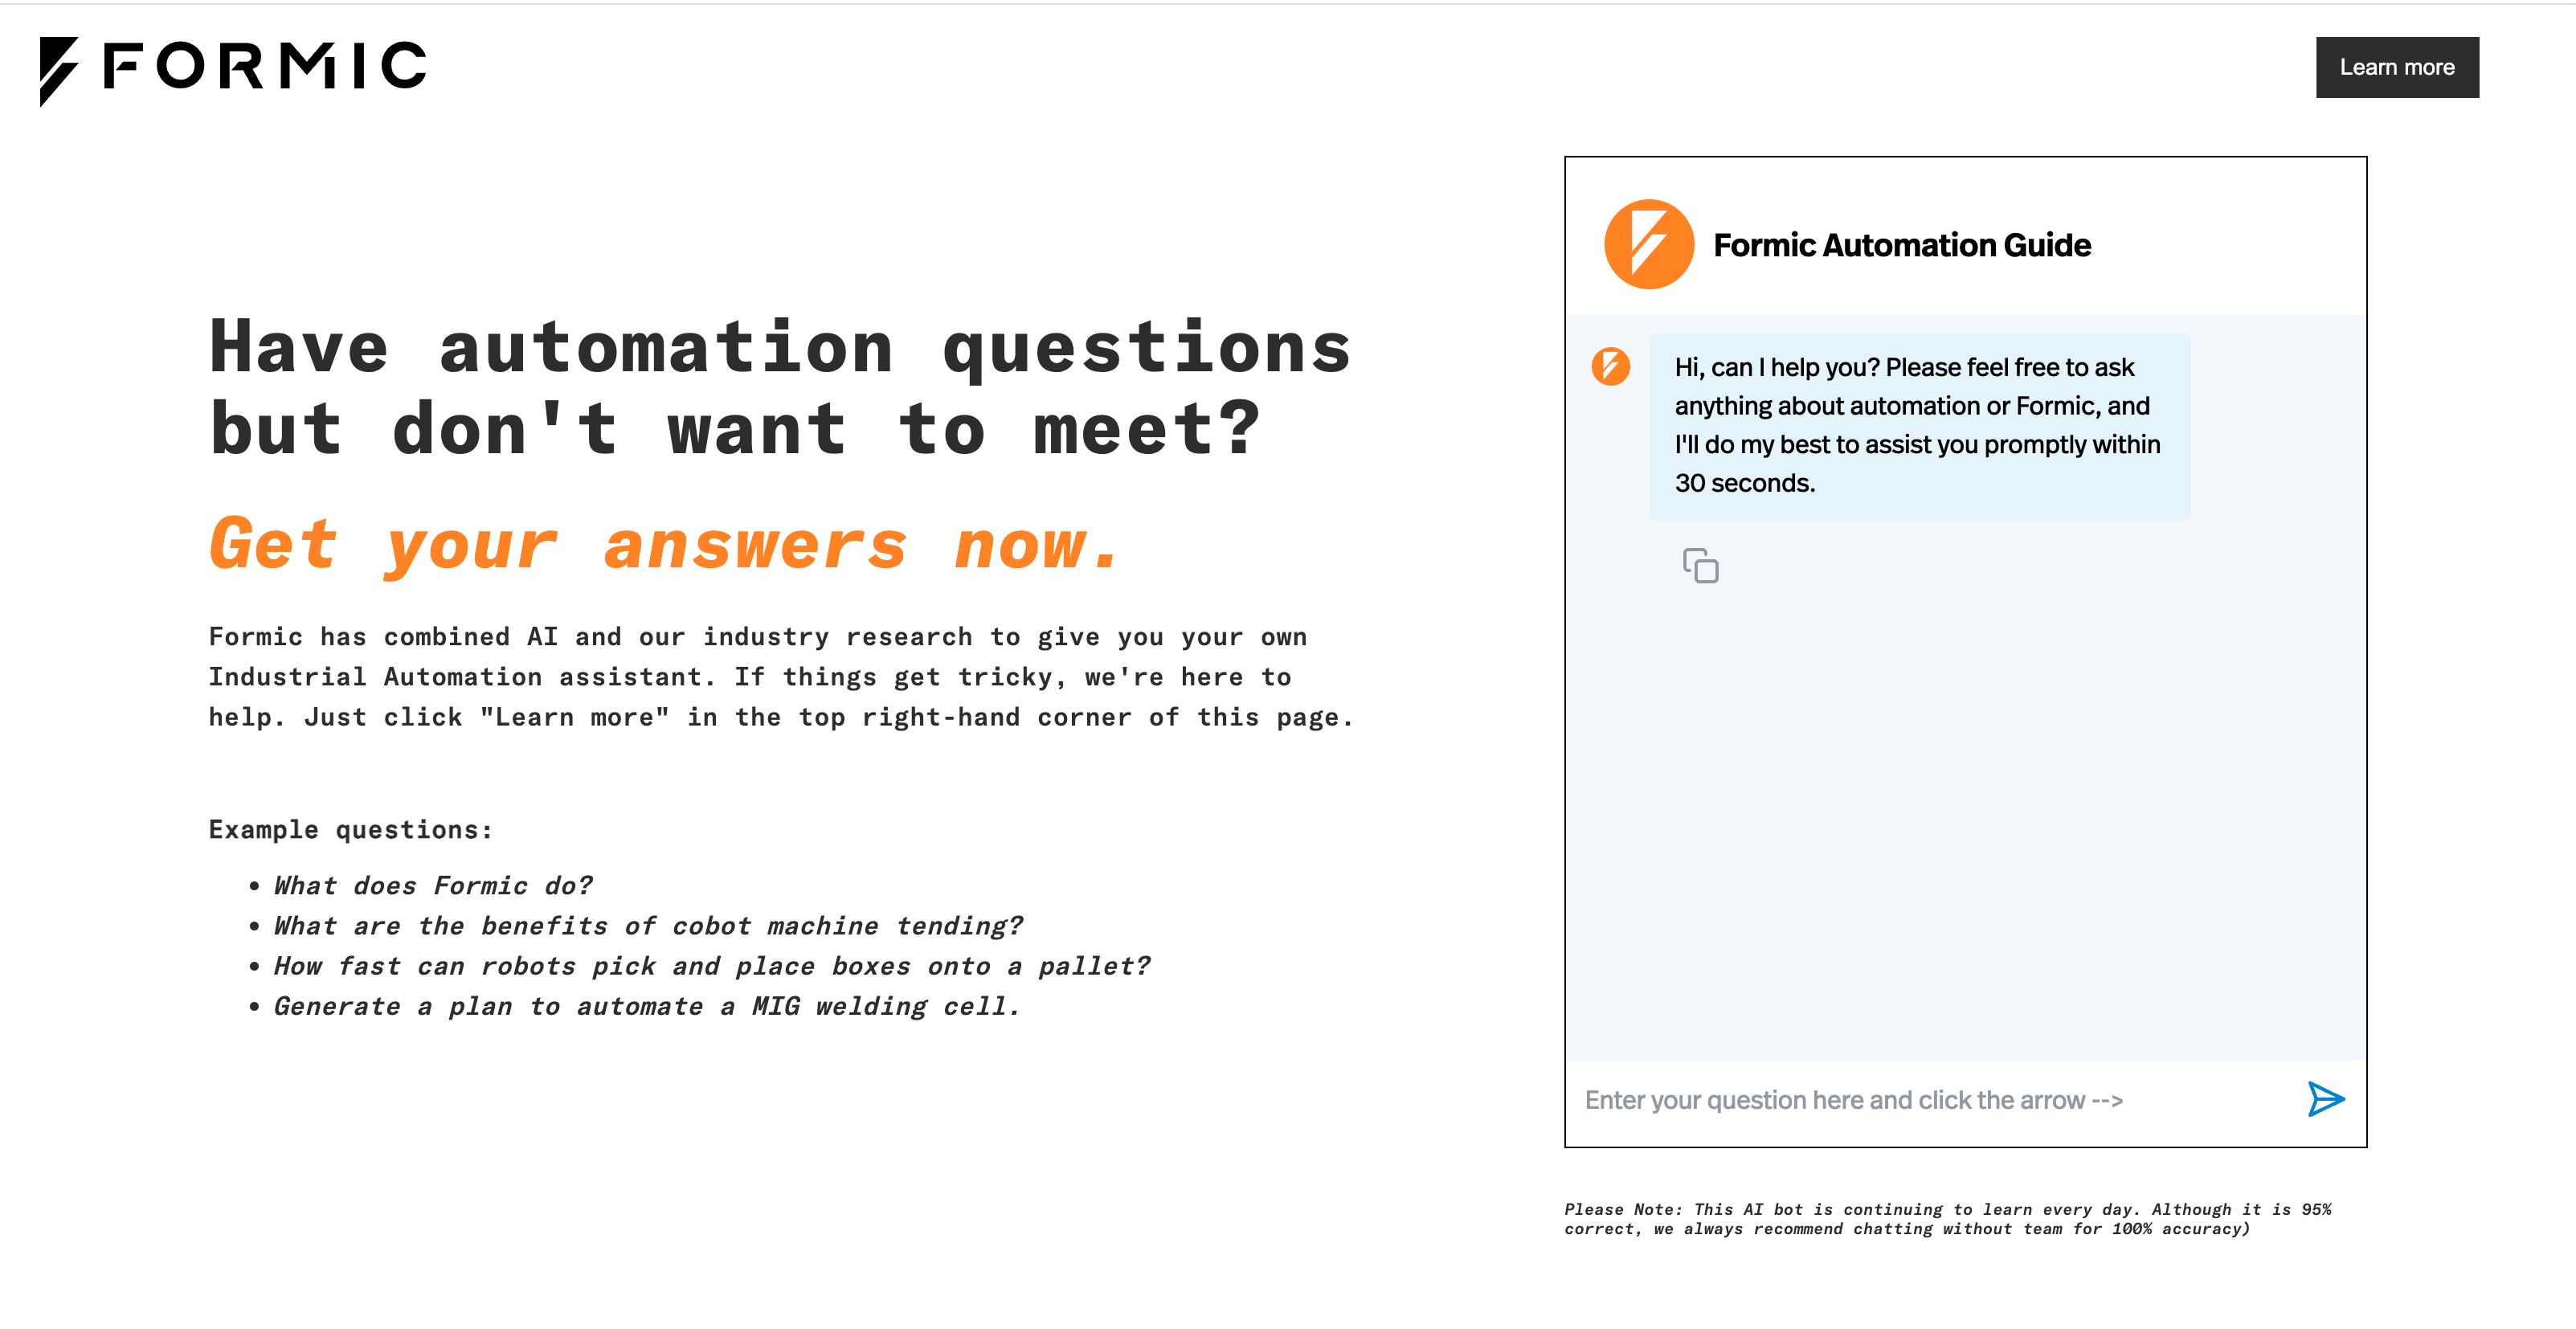
For example, robotics automation provider Formic uses an embedded chatbot to answer customer questions about their products. You can see Pickaxe's own example live on our homepage — meet Pickaxe Doorman, the agent embedded on pickaxe.co that helps visitors learn about the platform.
Visitors can ask detailed questions and receive instant, on-brand answers. No waiting, no friction, no lost customers. Embedded agents are great for support — and they're equally powerful for lead generation.
Let's dive in.
Why should you add AI to your website?
Many small businesses and solopreneurs sell professional services — consulting, coaching, marketing, design. Historically, these services don't scale because your time is the limit.
Large language models change that. With a well-designed prompt, you can capture a slice of your expertise inside an agent and serve unlimited customers in parallel. Routine questions get answered automatically; only the harder cases reach you.
Embedding an agent right where your audience already is — your homepage, your help center, your Notion workspace — turns your site from a static brochure into an interactive assistant. That's a real competitive edge for any small business or creator.
How to embed AI chatbots into your website
Pickaxe is a no-code platform for building, deploying, and monetizing custom AI agents. Embedding one on your site takes three steps: build the agent, create the embed, paste the code.
Step 1 — Create your agent
Head to the Agent Builder in your Pickaxe Workspace. The builder has four tabs that walk you through everything an agent needs:
- Prompt — write the instructions that define how your agent behaves.
- Configure — pick a model, set temperature, choose a starter message.
- Knowledge — upload PDFs, docs, or URLs the agent should reference.
- Actions — connect tools like Gmail, Notion, web search, or custom APIs.
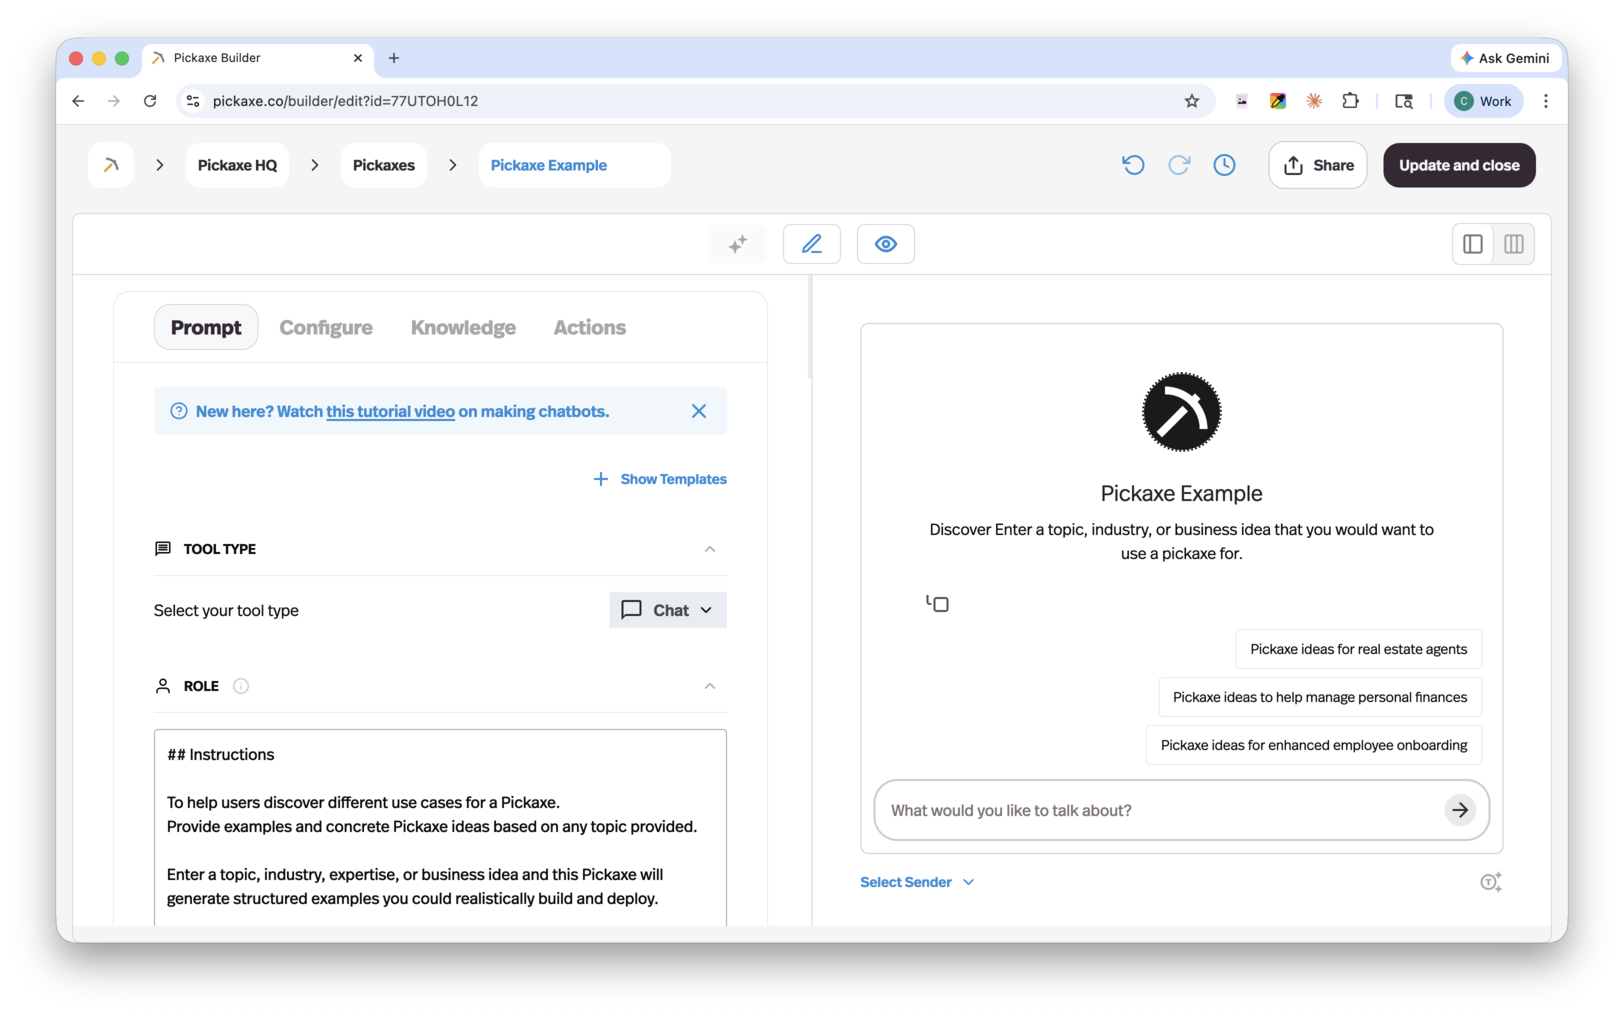
The art of prompt design matters here. The clearer and more specific your prompt, the better your agent will perform. For a deeper dive, read our anatomy of a good prompt guide before you ship.
When you're happy with the agent, hit Save. Pickaxe auto-publishes your changes to your Workspace, so any embeds already live on the web update instantly with the new prompt, knowledge, or actions. No re-deploys, no code changes.
If you want a complete walkthrough of every builder feature, the Pickaxe User Manual is the most thorough resource.
Step 2 — Create an embed
Once your agent is saved, click into it from the Pickaxe dashboard. In the agent's overview screen you'll see a Deploy tab — that's where every distribution option lives, from a hosted page to a Slack integration to website embeds.
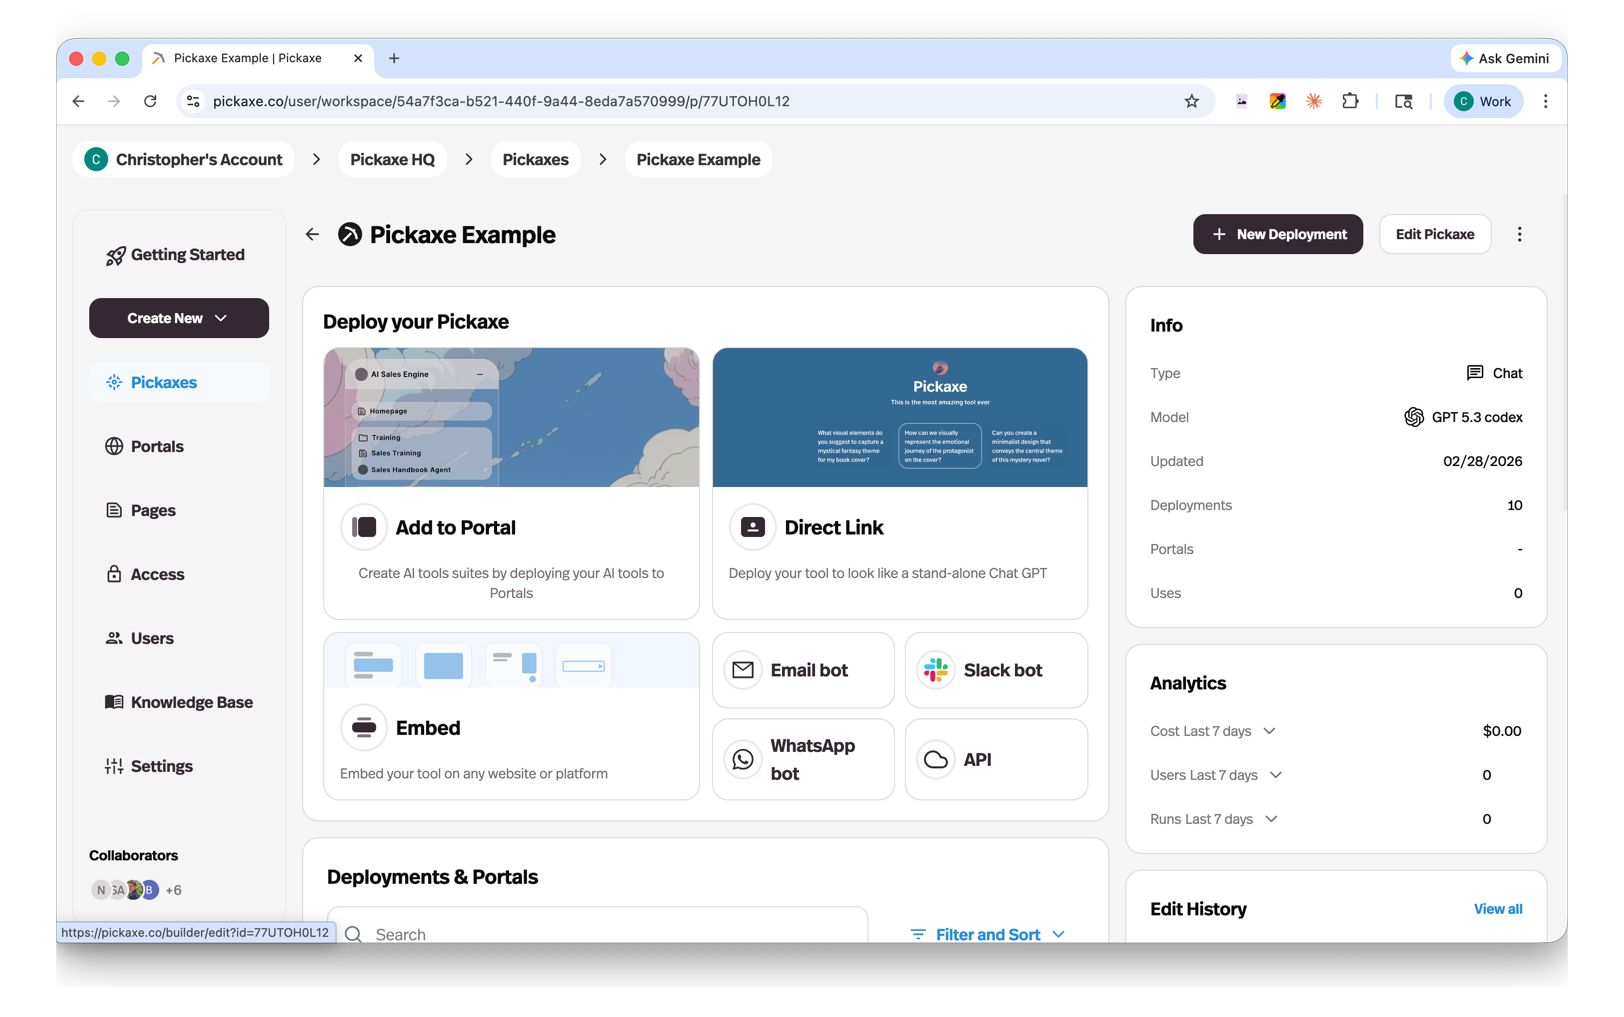
Click into Deploy → Embed and hit + Create Embed. You'll be asked to pick an embed type — Pickaxe currently offers five, each suited to a different layout and user experience:
| Embed type | Description |
|---|---|
| Inline Flex | A responsive chat interface that sits directly within your page content and adapts to its container. |
| FAB (Floating Action Button) | A familiar chatbot button that floats in the corner of the page — the classic chat widget experience. |
| Popup from Button | A chat window that opens when a user clicks a button you place on your page. |
| Chat Input | A standalone input field that can be placed anywhere on your page. |
| Inline (iframe) | A fixed-size iframe embed for dropping an agent into any page with full isolation. |
Pick the type that matches your goal. FAB is the most common for support and FAQs. Inline Flex works beautifully on landing pages where the agent is the main attraction. Chat Input is perfect for hero sections where you want a search-bar feel.
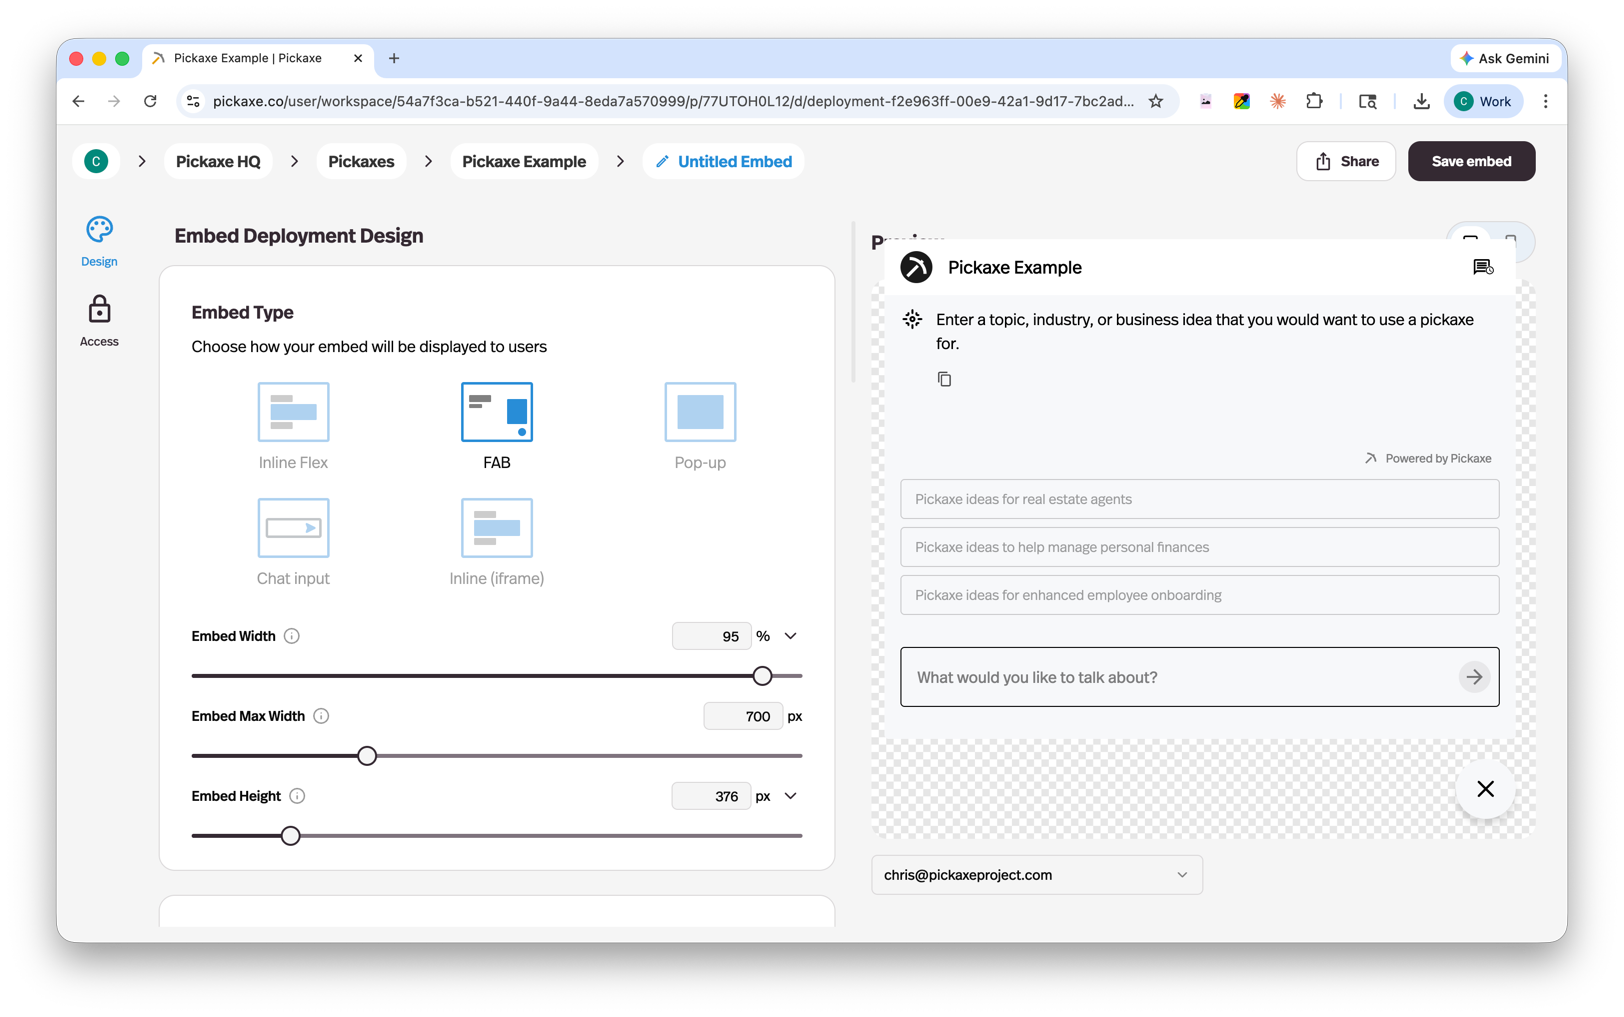
From here you can fully customize the look and feel:
- Color and font — match your brand exactly.
- Sizing — set widths, heights, and corner radii.
- White-labeling — remove Pickaxe branding on paid plans.
- Placeholder text — guide users with prompts like "Ask me about pricing…"
- Usage limits — cap messages per visitor and set a friendly message when limits are hit.
When you're happy, click Save Embed in the top right. This is where Pickaxe really shines: once an embed is saved, you can edit the styling at any time without ever changing the embed code on your site. Tweak the color, swap the placeholder, switch from FAB to Inline Flex — your live site updates the moment you save.
Step 3 — Copy and paste the embed code
At the top of the embed editor you'll find your embed code — a small <script> tag (for FAB, Popup, Chat Input, and Inline Flex) or an <iframe> snippet for the Inline embed type. Click Copy code.
Paste that code into your website wherever you'd like the agent to appear. That's the entire integration.
If you're hand-coding HTML, drop it straight into your page. If you're on a no-code builder, every major platform has a way to paste an embed snippet — Wix, Squarespace, Webflow, WordPress, Notion, SharePoint, Kajabi, Framer, and more. Need more detail on a specific platform? Our guide on integrating AI into Wix, Webflow, Squarespace, and WordPress has step-by-step screenshots.
Embedding AI chatbots in different website builders
Below are quick instructions for the most popular tools. The pattern is always the same: find the embed block, paste the code.
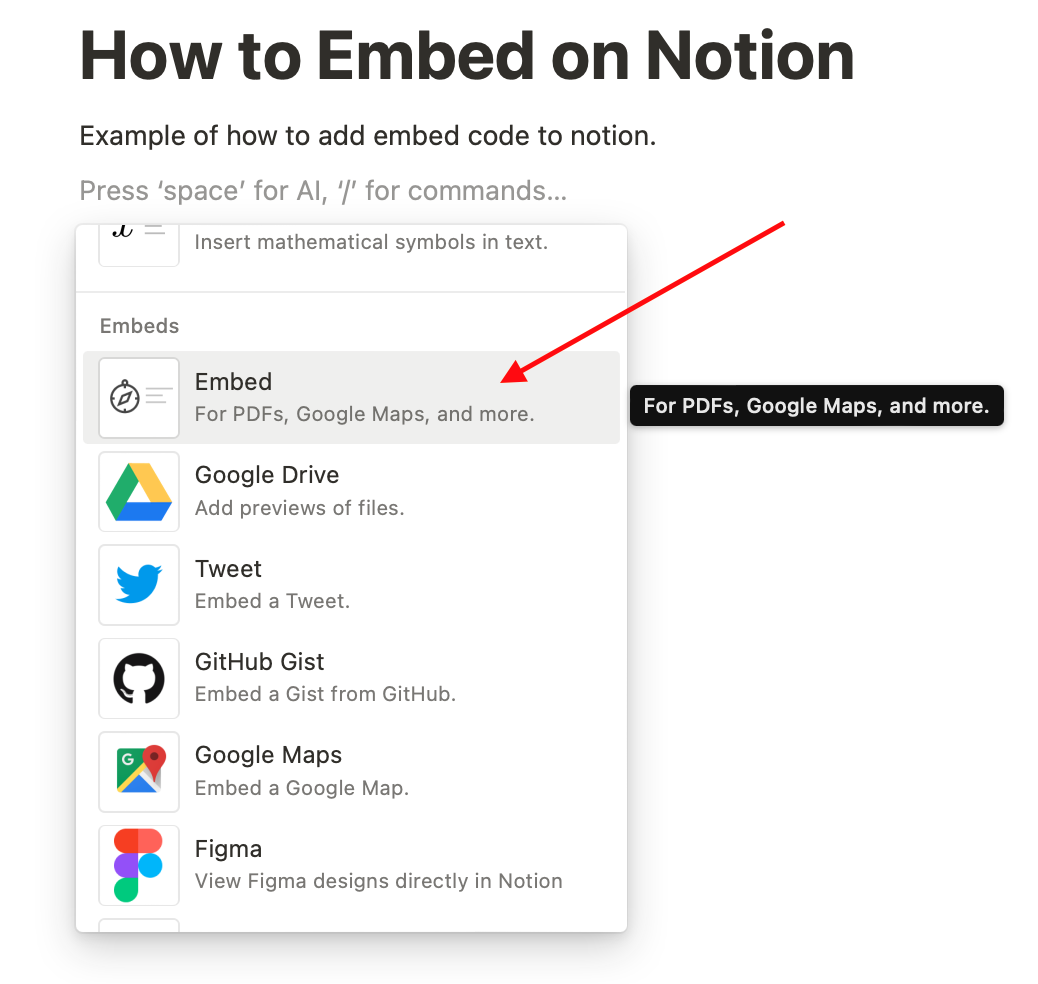
Notion
Add a new block by clicking the "+" button. Scroll to Embed, click it, and paste your Pickaxe embed link. Your agent appears inline in your page — perfect for internal team workspaces or public Notion sites.
Webflow
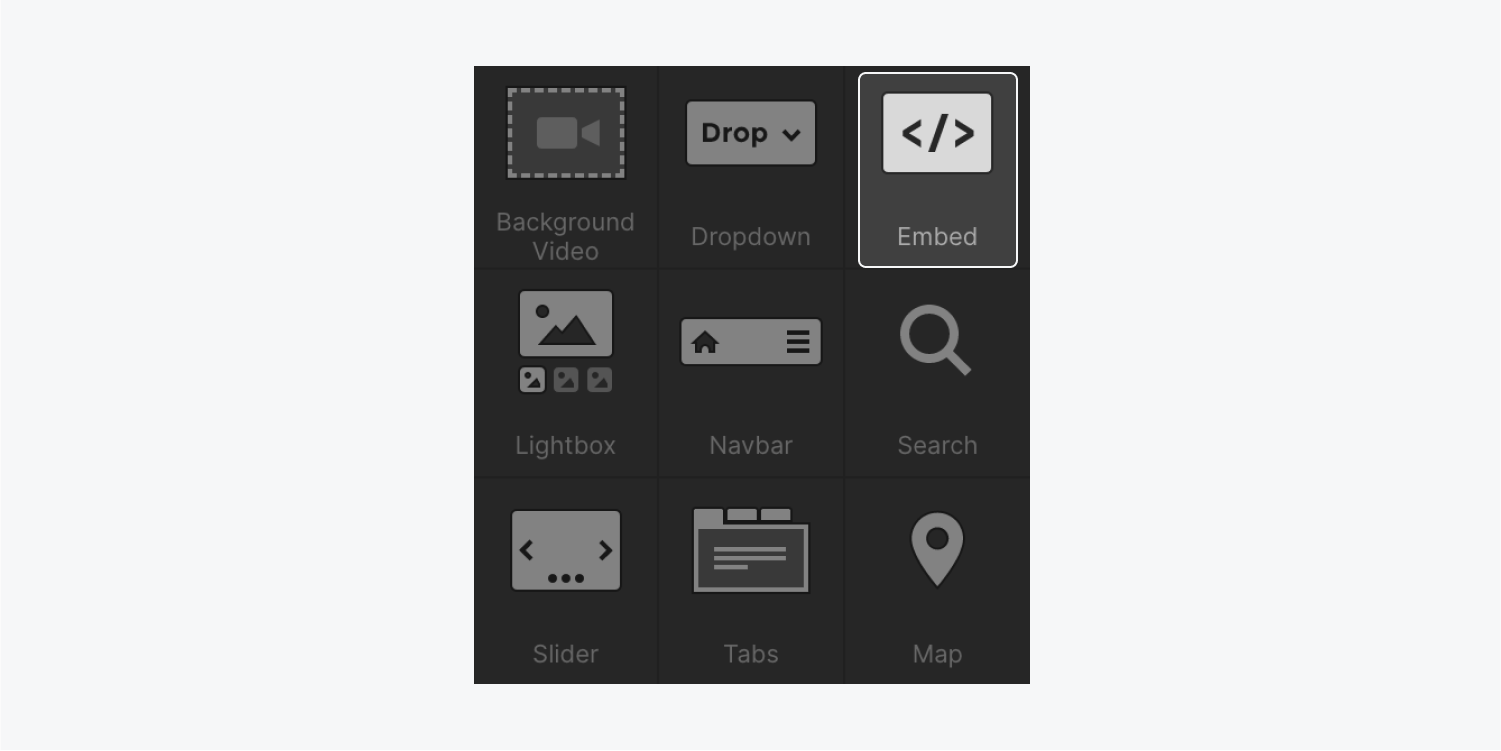
Drag an Embed element from the Add panel onto your page. Paste the embed code into the dialog and publish. Webflow renders it natively.
Wix, Squarespace, WordPress, SharePoint, Kajabi, Framer
Each of these platforms has an "embed code" or "custom HTML" block. Drop it onto your page and paste in the Pickaxe code. The Inline Flex and FAB embed types both work well in any of these builders. WordPress users can also use a Custom HTML block inside the Gutenberg editor.
Why teams love Pickaxe embeds
A few features make Pickaxe embeds especially powerful for non-developers:
- Edit styling without touching the code on your site. Change colors, copy, sizing, or even embed type — your live site updates the moment you save.
- Auto-updating agents. Improve the prompt, swap the model, add new knowledge, or connect a new action — every embed across every site picks up the change instantly.
- Five embed types for different placements and use cases.
- Built-in usage limits so a viral spike doesn't blow out your credits.
- Universal compatibility with Wix, Squarespace, Webflow, WordPress, Notion, SharePoint, Kajabi, Framer, and any HTML site.
Building a chatbot, customizing the embed, and pasting in the code is genuinely all it takes. If you want a concrete example to copy, our FAQ answer bot tutorial walks through one end-to-end.
For a complete reference on every Pickaxe feature — from Knowledge and Actions to monetization, analytics, and white-labeling — check out the Pickaxe User Manual. And if you get stuck, the team and community are at community.pickaxe.co.
Now go embed something. Your visitors will love you for it.